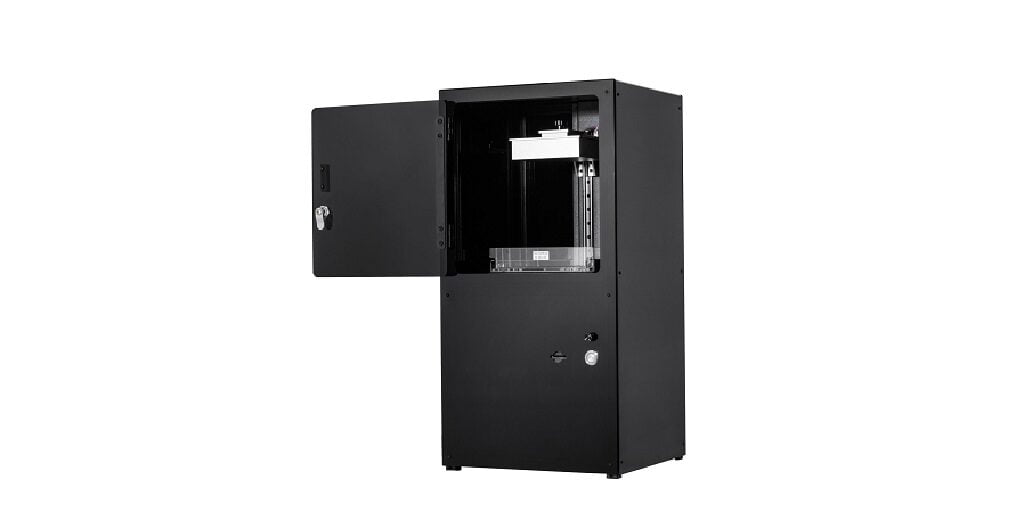
Peopoly Moai SLA 3D Laser Printer: A couple of weeks ago we received a big parcel. This parcel contained the individual parts of a prototype i.e. our first SLA 3d printer. Their manufacturers say that this is the best way to get into laser 3D printing. Well, on first view it looked like a classic safe with a key lock, etc.
This new version of the 3D printer is currently on Kickstarter. In comparison to traditional 3d printers that basically use molten plastic to constructing objects and SLA 3d printer uses a UV laser. This laser hardens UV-sensitive resin to do the same. Now, of course, the Kickstarter campaign presents all the amazing features my 3d printer has to offer. But the question is how easy is it to build, does it print without any problems, and what do I think could be enhanced let’s find out.
Now after using it a few times. We are presenting you with an in-depth review of “Peopoly Moai SLA 3D Laser Printer”. We will discuss its looks, assembly, working, efficiency, finishing, etc. Let’s get started with our Peopoly Moai review.
Peopoly Moai: Part I Intro
Key Features
Following are the key features as noted by us and provided by the Peopoly’s official site.
- Print Volume: 13cm X 13xm X 18cm.
- Laser spot: 70 Micron.
- FET Vat included for strong printing.
- UV_LED for post-curing.
- G-Code printing enabled.
- Wide range of resin i.e. from low-cost resin to specialty resin.
- The sensor-controlled heating process keeps the temperature at 30 Celcius.
- Developer/Researcher mode enabled.
- 5 Micron printing layer height (Adjustable)

Peopoly Moai SLA 3D laser printer is a high-resolution 3d printer. It uses a laser shining onto a galvo assembly to reflect the laser dot onto the bottom of the VAT. Where light-sensitive resin is cured to form the model. The VAT is also motorized so it can tilt and release each layer. Apart from that, the standout feature is it’s 130mm by 130mm by 180mm build volume
Peopoly Moai Part 2
Printer Assembly
Part I
First off we have to say that all the printer parts inside the parcel were nicely packaged. Sometimes even a bit too well (We’ve to struggle to open them).
After unpacking and expecting every single component we did not notice any kind of recognizable damage.
So it was time to print out the building instructions.
These instructions consisted of clear pictures and the short description which always mentions the necessary screw type.
Since the screw bags were all nicely labeled it was quick and easy to find the right ones.
We started the building process by connecting the eight pieces of maker slides to create the main cuboid structure of the printer.
Afterward, we secured the z-axis with a stepper motor to the back of the structure.
Mounted the metal piece for holding the resin beds along with an additional lifting motor.
It was in the middle of the cuboids.
Attached the bottom plates.
Next, we inserted and mounted the front plates.
We continued by mounting the x and y.
Gather nominal drivers and the laser with a mirror reflection system to the bottom plates.
The rotary encoder for controlling the printer to the front plate.
Through the help of the wiring schematic, we then connected all the electronics boards to one another.
Added the complementary metal sheets to the bat holder and already started mounting the black acrylic cover to the front side of the printer.
We said already here because we were almost done with the building process.
After all only three hours which is by far the shortest amount of time that is required to assemble a 3d printer kit.

Part II
But, here we were thinking everything is going smoothly, and a problem arises.
We have to say that these standoffs for the front door of the printer were not mentioned in the instructions. Nevertheless after securing the main power switch deep backplate and the DC jack we finished.
The power wiring plugged in the power brick, inserted the words, and build a platform, and finally turned on the machine.
After changing the Z preset position of the printer.
We build platform load onto the VADs and it was time to level it by adjusting the four nuts underneath it.
Then we cut out a circle template provided by the manufacturer.
Placed it inside the vet stand.
Use the SD cards which are included.
View test codes to check the functionality of the laser system. (While working with laser even though it only has a power of 150 milliwatts it is always recommended to use laser safety glasses)
Now as you can see the circle created by the laser look pretty accurate at least.
After some diagnosing, we found that we reversed the x and y connections. (So keep double-checking those connections)
So that means that the printer was properly calibrated.
Now, it was time to attach the remaining two side covers.
Installed the QR software there we entered the machine settings provided by the manufacturer.
Imported our printing profile after importing the ring test STL file I saved it as g-code to the SD card.
Started the first test print.
You can also select one of our free STL files from our product page, link given below.
Mini Turbojet Engine: The Best 3D Printable Electric
Peopoly Moai Part 3
First Print
In the first test print, it was a dry print meaning without the resin. It is performed in order to see whether the printer moves like it’s supposed to. Since that was apparently the case, put on disposable gloves and open the can of resin. Resin has a very neon green unnatural color but nevertheless, I filled up the vats to 1/5.
Other tides with the resin and started the print and even though all the motors and the lasers seem to work. During the printing process, no traces of solid resin were found. So we tried recalibrating the machine and started a couple more test prints with the benchmark g-code of the manufacturer. Only to find out that this didn’t change anything but what stood out to us was that the laser spots looked a bit unfocused.
Changing the position of the laser itself did not fix this problem. Thankfully though with the manufacturers send me a new one which we immediately secured in its rightful place after trying out the ring code once again. This time we immediately noticed that the laser was much brighter and also focused.
Therefore it was no surprise that finally something solid was created with the resin. After reinstalling the build platform and restarting the prints the machine finally worked like it was supposed to and created the intended object without any problems.
Peopoly Moai Part 4: Practical Experience
Peopoly Moai Upgrades
Shura Slicer
When we first got this printer we have to add support in third-party software such as Zenith or g2. Then import that into a custom version of cura. Now Peopoly has a Shura an all-in-one solution that we really like. You can rotate position and you can even hollow out the model to save resin and all of the support and slicing is contained within as well.
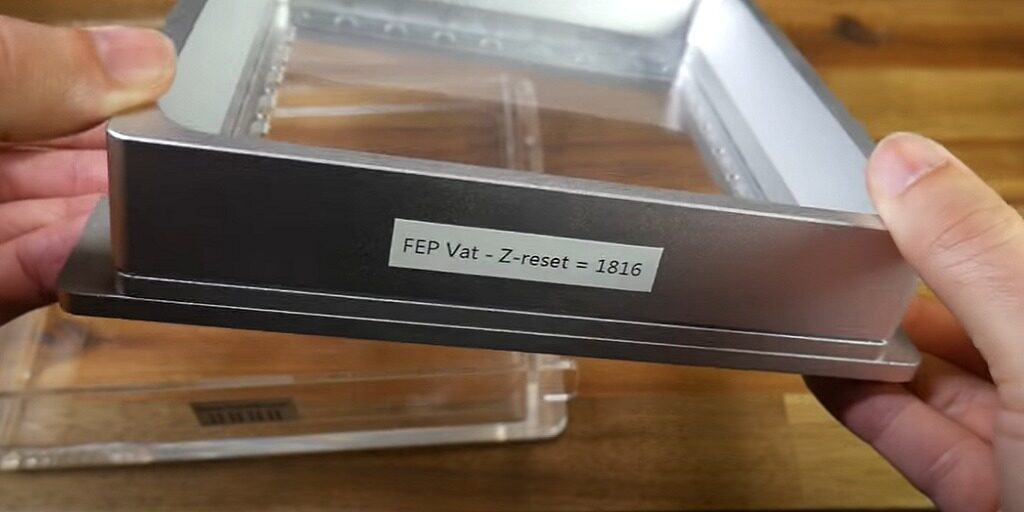
The VAT
Previously we had a PDMS which is a silicon layer in an acrylic VAT. Eventually, this tears, and the whole thing needs replacing. But now we have an option for FEP film which is replaced without changing the entire VAT. That’s the pros and cons of the two types of VATs. We prefer the FEP because that’s what we are used to from other resin printers.
Build Platform
Previously your build platform leveling was adjusted underneath the machine. After printing a small test object in each corner and measuring it even though it was meant to be reliable in my opinion that was far too involved and messy. Now if you optionally purchase the easy level build plate you simply unscrew the four bolts, bring the flight to meet the VAT, and then tighten them up again, and the two will be mated together perfectly.
Peopoly Moai Part 5
Pros and Cons
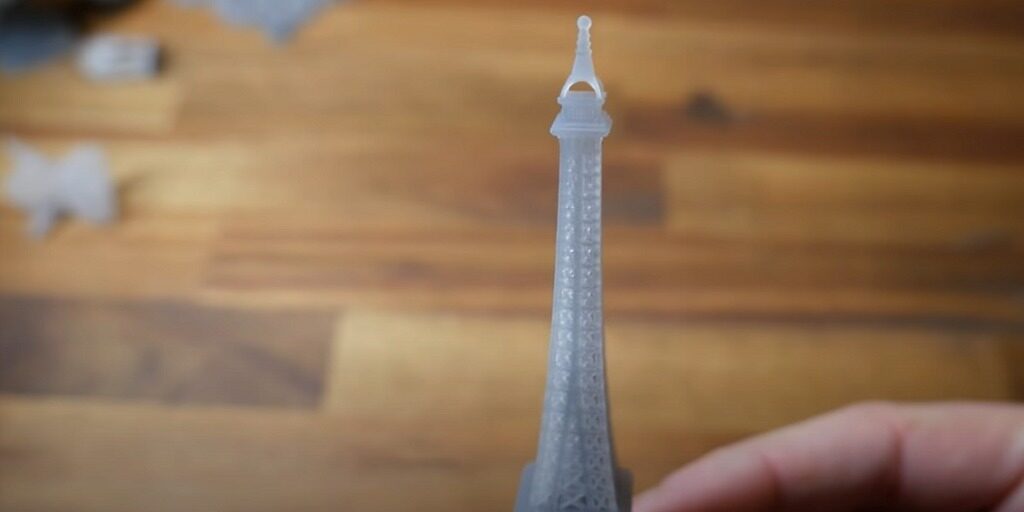
Print Quality
Starting with the print quality. The detail and resolution on this printer far exceed FDM. Now I know there are some pretty nice prints around with small nozzles but this Trump’s all of that. Look at the struts on this Eiffel Tower(Image Below) or how small the lattice is on this Yoda. Jewelry like the ring found as a test on SD card.

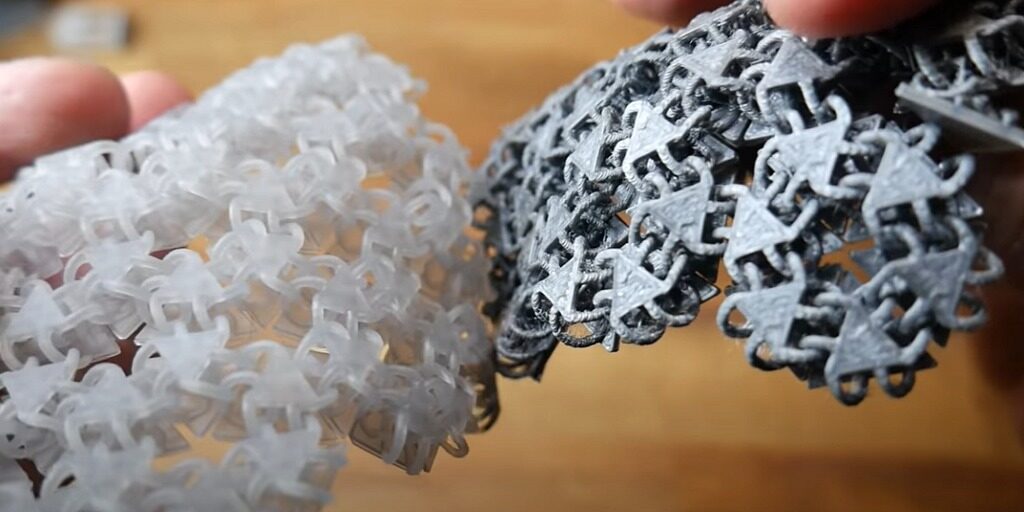
The most likely thing people are going to print on these printers is probably models and specifically miniatures. So we printed some. Now we don’t know anything about these characters and what they’re meant to look like but it seems to me that they’ve turned out great. We tried out this chainmail (Image below) and it formed beautifully just look at that flow. The way it moves is equivalent to FDM but the surfaces are so much cleaner. We then scaled it down dramatically and we think we finally found the limit. As some of the parts haven’t fully formed and the flow is not really what it should be.
Support and Removing Them
The Achilles heel of any resin printer is the amount of support material you need to add to your print to get that to turn out successfully. After you’ve cleaned off the excess resin and fully cured it under a UV lamp the support lattice must be removed. By this stage, the resin is brittle very brittle which makes the print easy to snap or cut off.
But the finished models will explode if dropped. We printed a bust, it is the perfect example of the implications of this type of support. It’s perfect on one side and dotted with scars of support on the other. We could sand these further to remove these scars. But we’ve left them in for two reasons firstly it shows you what you can expect from this type of process secondly we really hate sanding.
Price
We would personally recommend getting this printer with the FEP kit, easy-to-level plate, UV curing light, and some spare FEP film. These all add up to just under the US $1500. Now that’s much more expensive than most FDM printers but they call this affordable. How can that be, well that’s because the competition for this printer “The FORM-2” from FORM labs is almost double the price.
In our opinion, the question is not whether this printer is any good or not. We can definitely vouch for the fact that it is, the question is how really well you want to commit financially to this type of technology.
FAQ
The Peopoly Moai has one of the largest build volume i.e. 13cm X 13cm X 18cm.
The laser spot in Peopoly Moai SLA 3D laser printer is of 70 Microns.
Peopoly Moai SLA 3D printer could print the thinnest layer of 5 Microns only. This layer height is adjustable through printer settings.
Peopoly Moai Part 6
Conclusion
This printer compared to other resin printers has a really large build volume which is going to be attractive to most people. If you are heading down this path just keep in mind the special consideration for both the mess and the safety that you get with this or any other resin printer.
So that’s it for the Peopoly Moai SLA 3D Laser printer review. We hope that you have liked our in-depth analysis of this laser 3D printer. Share your thoughts with us on this 3D printer in the comment box below.