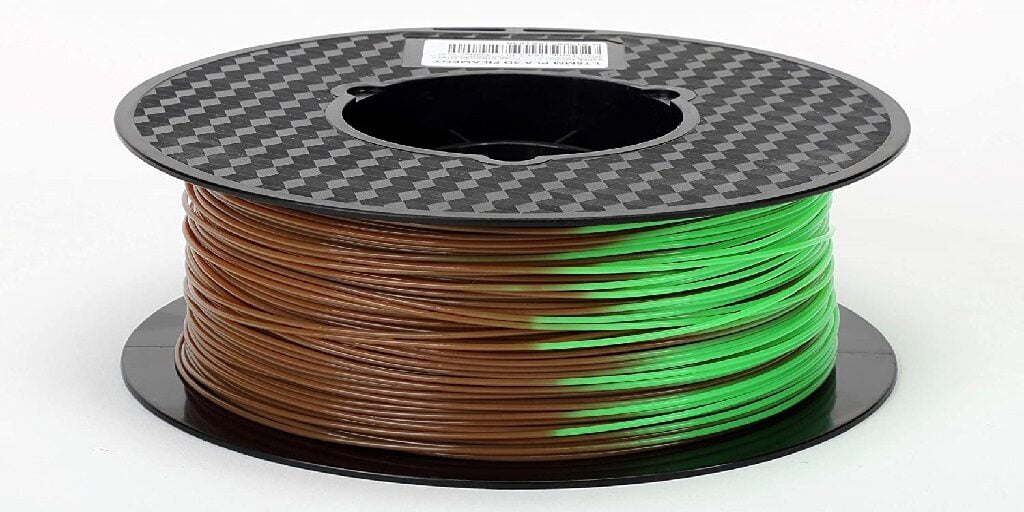
There is a surge in 3D printing the models using Flexible Filament and thus everyone is searching for new flexible filament print ideas. Such filaments have gained overnight popularity because they broaden our 3D printing spectrum and give birth to whole new possibilities. For instance, it wasn’t possible to print the resilient yet soft protection cases, RC airplane Wheels, or other flexible objects as long as PLA or PET-G type filaments dominated the filament categories.
However, with the inclusion of flexible filaments, you have the freedom to make a lot of things. But flexible filament test print is more tricky than one can think. They require special printer settings, temperature variations, and unique files to print the intended designs. This article will help you uncover the methods and inspire you in your test printing adventure using flexible filament.
What are the basic settings that need to be done for flexible filament test print? The settings that are required to be checked are hardness, retraction, idler, filaments moisture, printer settings, etc. we will talk about them in the post further. We will also talk about some flexible filament print ideas that you can test print with your 3D printer with flexible filament.
Preparation For Flexible Filament Test Print
To start printing your desired 3D model with flexible filament some of the changes are required to be made in comparison to the normal prints which you do using PLA & PETG filaments. Make the following necessary preparations before starting with the main models and also perform test prints to know your optimum settings.
Printer:
To test print the flexible filament print designs, you have many FDM 3D printer options available. One of the best is the Original Prusa i3 MK3. The reason is it can be used for various materials, including flexible filaments.
However, we recommend you use the MK3S version of the extruder to make it more flex-print friendly, its best option is given by Creality’s Ender 3.

Shore Hardness:
Flexible Filaments usually have shore Hardness ranging between 75A and 85A. You may also see the filament having shore Hardness up to 98A. As the number goes high, your test prints will become more rigid. So we suggest you choose the shore Hardness depending upon the flexible filament test print you want to create.
A rule of thumb can be applied that lesser the shore hardness flexible is the print. But, you can’t go very down because some hardness is required for the stability of the 3D model.
Retraction:
Turn off the retraction in the printer. The reason is retraction can create unwanted tension that makes filament unnecessarily expanded. This expansion eventually creates the clogs.
Retraction is the printing feature of the 3D printer generally done to avoid stringing and other 3D printing errors. This is done by pulling the filament back while moving or changing its position from one point to another. But, doing this with flexible filament could cause clogging of the extruder due to continuous back and forth movement of flexible filament.
Loosen The Idler:
Lose the idler to the maximum extent you can to avoid filament tangling around the bond tech.
Printer Settings
These settings are generally recommended, but you must also consider the requirements of the specific filament you are using.
| Parameters | Value |
|---|---|
| Hot end temperature | 210-240 °C |
| Bed temperature | 0-60 °C |
| Print speed | 5 to 30 mm/s |
| Retraction | Generally off |
| Fan speed | Off for the first three layers and then 20-60% |
| Extrusion system | Direct drive |
| Special filament preparations | Dry flexible filaments |
Now we are done with preparation and printer settings, let’s dive into the world of flex printing adventure.
Flexible Filaments Print Ideas For Testing
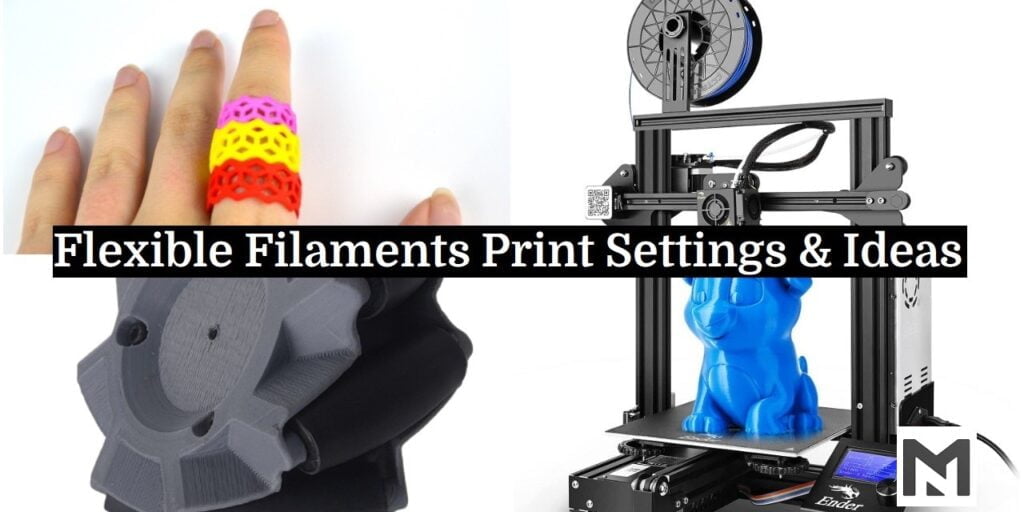
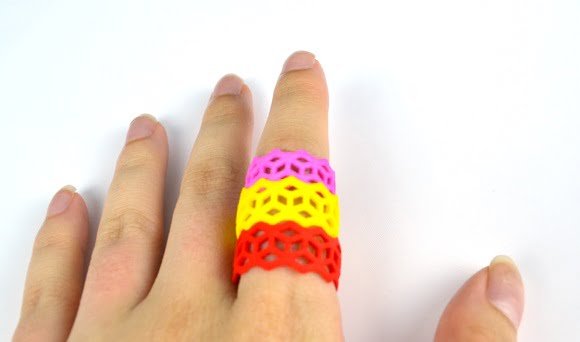
Ring
Are you fed up wearing the metal ring all the time? Maybe it’s time to make your own ring that is flexible and easy to wear on your finger. And all this is to design using the Flexible Filament. The simplistic design structure allows you to print the ring without a hitch.
You can use the NinjaFlex Filament for the layout. The model is usually support-free because the ring print doesn’t have any possible overhangs. The design of the ring doesn’t require unique settings. So, you can resort to your default slicer settings for this flexible filament test print.
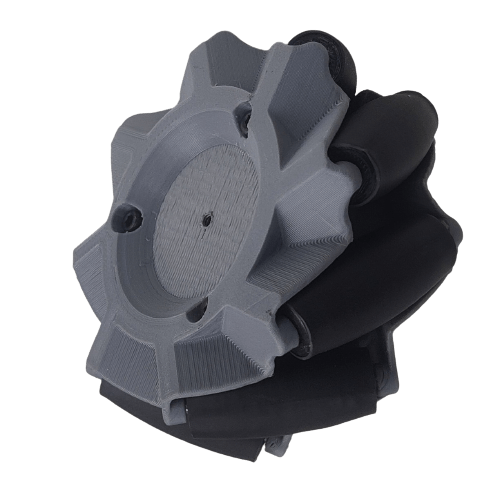
RC Model Tyres
You can also experiment with the printing of tires using Flexible Filament. The Prusa Printers have also done similar design practices. They used the filament with a shore hardness of 98A, with two perimeters and an 8% infill. However, this flexible filament test print made using such hardness didn’t have good adhesion.
So the tires printed at 98A flexible filaments are better used as landing gears than car tires. To print the car tires model, you should change the infill parameters and other perimeters to get the structure of a soft tyre. Otherwise, the tyre will lose the prime key feature of the flexible nature of filament. The recommended flexible filament is at 92A with one perimeter and an 8% infill.
You can find the link of the design here Mecanum Wheel STL Files.
Wrist Watch Strap
Ever think of changing your watch strap without purchasing it from the market? Maybe it’s time to make your colorful straps at home. We recommend you to use Thingiverse’s customizer app to get the design with customized color, Length, and width.
You have the liberty to choose among different flexible filaments. Ninja Flex, Filaflex and Taulman 3D PCTPE can be used. It is noteworthy that you must print with 100% infill to get better results.
If you are interested in making the bracelet from the flexible filament, use 3D Mate. The recommended layer height is 0.2 mm. The pen will use only 2 grams of filament and take up to 15 to 25 minutes to create your bracelet.
Ear Saver
If you wear the mask around the clock, you probably use the ear saver. These have become popular since the beginning of the Covid-19 Pandemic. So give it a try to print your ear saver with the FDM 3D printer. The designer, Fiddly Bits, has already made such designs. The ear saver is printed with flexible filament in two recommended sizes: 144-mm and 166-mm.
The designer suggested to us Prusa i3 MK3S for this flexible filament test print. And the most suitable flexible filament is SainSmart TPU. The layer height should be 0.2 mm, and 3MF and G-Cide files are required for the design.
We hope you like these test Print ideas. Practice them at your home, and let us know in the comment section below about your experience with these designs.
FAQ on Flexible Filament Print Ideas
There are various settings that you need to look at before starting test printing with flexible filaments some major of them are, retraction, correct 3D printer, losing idler, filament moisture, etc.
You can test print your watch’s strap holder it takes around 2 grams of filament and only 15 to 20 minutes of printing, although these numbers depend upon the volume of the print.
Yes, it is advised to keep retraction settings off while doing 3D printing with flexible filaments. Keeping it on could easily result in the clogging of extruders due to the back and forth motion of the filament.
Conclusion
We hope that you find this article on “Flexible Filaments Print Ideas | Settings & Ideas” helpful and will share your testing ideas and experiences with us in the comment box given below. You can also any queries regarding the topic in the comment box also.
Thank You.