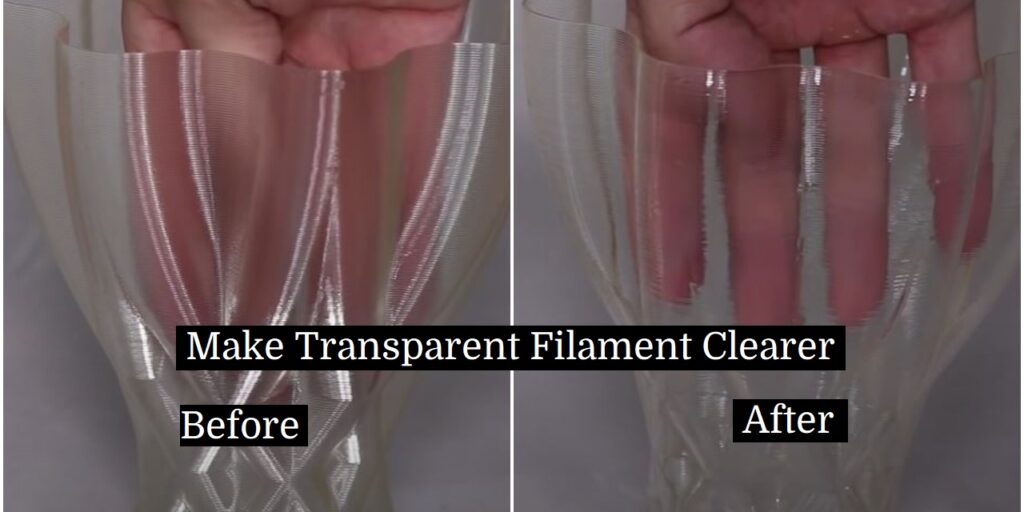
Transparent 3D printing is, printing a plastic part that you can see through. Applications of this technique vary from see-through vases to optical elements like prisms, art, or decorative pieces. Most 3D printed objects are not entirely flat. Achieving transparent 3D printing can be tricky and much care must be taken to get the best results.
How to Make a Transparent Filament Crystal clear? The best two post-processing methods are the Layer solvent method and the coating method. Although 100% transparency is impossible in FDM printing, 75%-85% can be achieved with proper printer settings and post-processing methods.
Both printer settings and post-processing methods are discussed in detail in the post further.
Complete Transparency In FDM (Fused Deposition Modelling)
Full transparency requires that light is not refracted, or distorted, as it passes through an object. Unfortunately, FDM 3D printing uses print head nozzles that create parts with rounded layer boundaries as the material is extruded.
Given the curved shape of the layers, light is easily refracted as it passes through the layers and makes 100% transparency impossible regardless of material, printer settings, or post-processing practices. This means that a part produced with clear material via FDM 3D printing will turn out to be translucent, or blurry when looked through.
Although we cannot achieve 100% transparency still, we can make it 75%-85% clearer. For this level of transparency, surface treatment is required to smooth out the surface to create a transparent 3D print. This is mainly done through post-processing processes.
In post-processing, a part may be sanded, chemically smoothed, or spray or coated to help increase transparency. The smoother a surface is, the higher transparency it will have. There are two separate means to achieve it.

1.) Layer Solvent Method
The first method involves using a solvent to smooth the print to remove the appearance of layer lines. For instance, PolySmooth filament, a filament type designed specifically for models which are intended to be transparent, can be smoothed using ethanol.
The ethanol is sprayed onto the print and left to dry. After several reapplications, the part will turn transparent, but the part may lose dimensional stability as a result of the application of a solvent to the print.
In addition, it takes a long time(days) to dry completely and be ready for the second coating spray. Finally, only PolySmooth filament can be used this way. Other forms of solvent finishing tend to fog up other plastics such as acetone smoothing on transparent ABS.
2.) Coating Method
Another method involves coating the print using XTC 3D or a spray-on polyurethane coating. These coatings are applied several times until the surface of the print becomes smooth and transparent. This is similar to painting an object; like the solvent method, however, it can change the dimensions of the part.
Both of these methods work by smoothing the surfaces of the print until the part becomes transparent. The only difference is whether material is added or removed.
To get better results in the case of both post-processing methods use the following printer settings and then follow the steps to get an even better transparent print.
Printer Settings & Steps
- The first step is to make a Vase in Vase mode of the printer with a thick nozzle . A 0.5mm layer height works the best,as smaller layer height through very small nozzles may get melted during Isopropyl post-processing.
Note: Not all geometries are possible in vase mode at a large layer height so check before finalizing any geometry.
- The basic idea of PolySmooth filament is that it’s soluble in alcohol, which means that layers can be easily melted with isopropyl alcohol.
Note: Touching the print too soon can leave fingerprints.
- On spraying with isopropyl alochal, it gets clearer with each pass.
Note: Make sure to spray the inside of the print as well. So, that it doesn’t entirely melt and mess up the bottom.
- A Vaccum Chamber may speed up the process up. It continues to get harder over time.
- The PolyMaker(Post-Processing Sprayer), results in a clearer print in comparison of a hand held spray. The only drawback being, that is destroys the bottom a bit due to melting under the graded plate at rest.
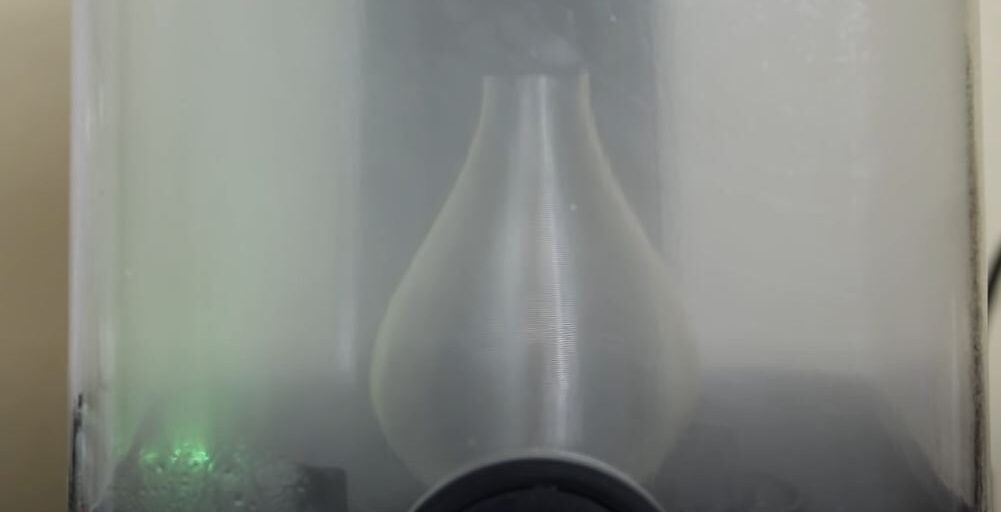
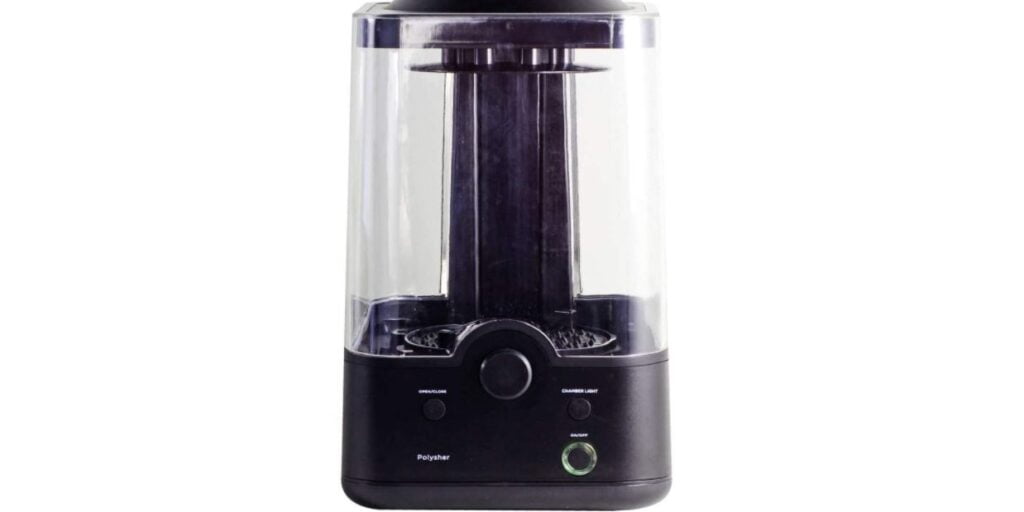
Observations:
- Anything lower than 0.5mm layer heights isn’t clearer enough.
- A good 12-24 hrs in between spray coats to keep it clear and smooth.
- Even though its one line width thick, the melting of the layers together doesn’t leave any gap for the water to slip through.
- Coloring the print with dyes (and adding a small amount of paint extender),may add a bit of opaqueness.
Mull Over
- Use a large size nozzle, with the largest layer height possible with the angles involved in the print. The higher details and steeper angles make it hard to be done.
- Print in vase mode.
Multiple shells are infilled, so it’s impossible to get a clear print.
- Use a spray bottle filled with high percentage of Isopropyl Alcohol(here,90% was used).
- Spray multiple passes, giving plenty of time(12-18Hrs) for each pass to dry before moving forward. So, as to avoid melting or messing up of the print.
- Rest the print on a surface, that is graded. Or use some aluminium foil, to help remove the print with minimal damage.
- Fill the project with water, if done right it won’t leak. It also helps to make it look clearer.
- Allow the print for upto a week to get its full strength back. Mix some clear paint with dye in an airbrush kit to give the model some color and finsihing touches as per your choice.
Apart from these methods and printer settings, you can also have a better clearer filament and then perform the steps discussed above to get a much better result.
Best Transparent Filament
Several FDM filament options will give satisfactory transparency. Some of them are discussed below:
ABS (Acrylonitrile Butadiene Styrene)
It is the most common FDM filament as it is the simplest material to print industrially and it exhibits excellent strength and impact resistance for moderate stress environments. This material can be smoothed with acetone vapor in pot-processing for increased transparency.
PLA (Polyactic Acid)
It is made from corn starch and sugar cane, which gives it a natural transparent appearance. For best results, PLA parts are sanded and polished in post-processing. While not likely to warp or shrink during printing, it is often very brittle and is best used for cosmetic pieces.
PC (Polycarbonate)
It is a strong material capable of handling loads where flex is required. As for 3D printing, to get better optical clarity, it must be printed at extreme temperatures, optimally around 500F. It can be smoothed with acetone in post-processing for a smooth, glossy finish.
Polypropylene
It is durable, fatigue-resistant, and lightweight. It is naturally a light shade of translucent beige, but it can be made optically clear. However, this material has low transmissivity, and it is suggested that PMMA or polycarbonate be used for better transmissivity.
TPU (Thermoplastic Polyurethane)
TPU is a flexible and elastic material that can be made in varying shore values to mimic the qualities of soft rubber, hard plastic, and anywhere in between. While flexible filament is more difficult to print, this material can produce excellent clear parts for many applications that require stretching or comparison.
PMMA
It is better known as acrylic, which, in sheet form, id often used in place of glass like you might find in windows or aquariums. It is strong, impact resistance, and lightweight. While comparable to polycarbonate, it is often preferred because it is cheaper. It may be made smooth with acetone in post-processing.
PET and PETG(Polyethylene Terephthalate Glycol)
They are both clear materials. PETG is the combination of PET and glycol, which makes PETG stronger and less brittle than PET. Particularly, PETG is better if you are aiming to make bigger parts that will be under strain.
Alternatives to Transparent Filament
There are many other options to explore, other than transparent filament. SLA, PolyJet, and MultiJet 3D printing all use resins to construct parts. With these technologies, layer lines are less visible, so transparency may be more easily achieved. However, these technologies are best used for cosmetic pieces only, not functional parts.
FAQ on Transparent Filament
It is biodegradable and has excellent properties. Translucent PLA filament is one of the easiest to print clearly and get good results. To get the smooth finish of the surface, sanded is needed after print.
Transparent ABS, in the context of molding materials, can raise a few eyebrows. ABS is normally taken to be opaque and indeed the vast majority of grades of ABS are opaque.
Conclusion
These are some key points that can be contemplated for doing it. There are many other methods, that can be tried. Feel free to share them, in the comment section(if you have, any).
Of course, if you are not interested in nailing transparency without having to go all the fuss yourself, there is always the option of using a professional 3D printing service.
THANK YOU!


