FDM 3D printing has been establishing itself as the manufacturing technology of the future across many industries. But, still, there are many peoples who are starting in this field. The one thing that all newcomers face is the finishing or post-processing of the finished FDM models. We ourselves have faced this problem in past, thus we thought to share our experience and learnings with all our friends.
What are some common techniques for FDM printing post-processing? The most effective FDM printing post-processing techniques are sanding, gluing, welding, vapor smoothing, polishing, priming painting, and electroplating. There are a few more popular techniques that are discussed in this post.
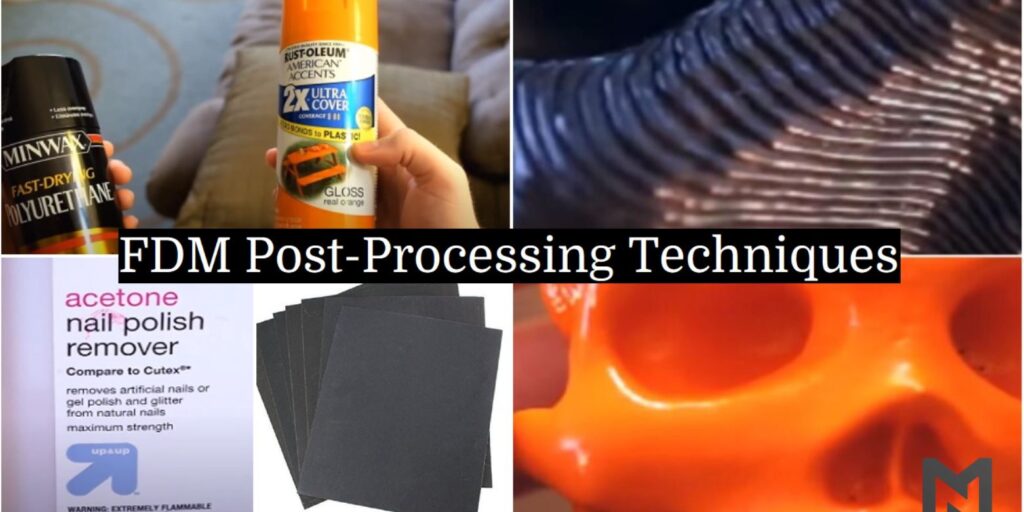
Many different post-processing techniques are employed and we will try and understand nine such techniques for post-processing of FDM 3D printed parts. We have explained each and every technique in detail and provided the drawbacks too.
Let’s dive into the post-processing techniques for your FDM prints.
In The Post:-
- Cleaning & Prepping
- Support Removal
- Insoluble
- Soluble
- Sanding
- Gluing
- Welding
- Support Removal
- Finshing of Print
- FAQ on FDM Post Processing
- Conclusion
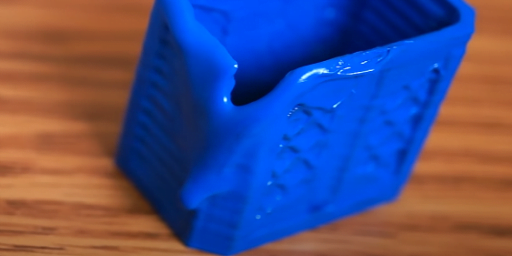
Cleaning And Prepping
In this process of cleaning and prepping techniques, it depends on the application of the item, as to how far can go for the final finished print. Usually, it is the first step in post-processing.
Support Removal
Support removal is the first technique employed for the post-processing of FDM 3D printed parts. It does not require much effort unless there are supports in tight corners or other hard-to-reach places. Mainly, there are two types of support materials, Insoluble and Soluble. (able to be dissolved in water or another liquid)
a.) Insoluble
These materials are generic materials like PLA, ABS, Nylon, PC, etc. These are generally insoluble in water filaments and are either removed by hand or by pliers and flush cutters. However, sometimes the supports are located in critical positions and it becomes difficult to reach and remove them.
b.) Soluble
Soluble materials like HIPS (used as a support with ABS material) and PVA (used as a support with PLA material) are far easier to operate with as they dissolve in a chemical called Limonene and water respectively.
Support removal usually leaves some marks on the touchpoints but these can be post-processed further for a smoother finish.
| Pros | Cons |
|---|---|
| This is the simplest method of post-processing. | Supports at certain critical locations may be inaccessible. |
| It is a minimalistic procedure requiring little to no equipment. | They might damage the part during removal. |
| Greater flexibility of design can be achieved with soluble supports. | Insoluble supports often restrict artistic freedom while designing the product. |
Sanding
It is one of the simplest methods for post-processing of FDM 3D printed parts. It is similar to sanding wood objects but it requires a lot of effort. The sanding has to be carried out in successive stages starting from low grit sandpaper (usually 150 grit) and moving towards higher grit sandpapers like 400grit, 600 grit till 2000 grit, or even more depending on the requirement.
While sanding the part, friction is created between the sandpaper and the surface generates heat, which may have a negative impact on the fine features of the print. To prevent this, simply wet your part before sanding to absorb any excess heat.
The drawback of sanding is the amount of time and effort it takes. Additionally, the material is unequally removed so the dimensional accuracy of the part will be hampered.
Apart from this, the fine particles of the material are released into the air and can enter the lungs while breathing so it is recommended to use a mask while sanding 3D printed parts.
| Pros | Cons |
|---|---|
| A very minimalistic approach. | It is a pretty tiresome process. |
| Works even on the roughest of prints. | It might affect the part’s dimensional accuracy if you are not careful. |
| Works on any FDM material. | It’s difficult to reach in certain critical locations or a part that may have smaller parts. |
| Post-processing costs are minimal because sanding is inexpensive. | It can cause fine particles of the material to be released into the air, which when inhaled can prove to be quite toxic and cause certain respiratory problems. |
| As it is an entirely manual process, sanding may be uneven on different surfaces due to human error. |

Gluing
In the case of parts bigger than the build volume of the printer, the part is broken down into multiple pieces. At such times, the PLA parts can be easily glued together by bonding agents like Anabond and SuperGlue, mostly used in industrial applications, or custom products like 3D Gloop.
It is generally used when something can’t be printed in a single piece due to the dimensional constraints of the primer.
| Pros | Cons |
|---|---|
| It forms a sturdy bond between pieces. | Limited to very few materials such as PLA that can be electroplated. |
| It’s an easy process. | While strong in themselves they are not as strong as whole parts. |
| It’s a pretty cheap technique. | |
| It doesn’t require much skill. |
Welding
ABS prints can be welded together. Welding here is by means of acetone. Acetone has the ability to melt ABS, so these parts can be joined using acetone welding. Light layers of acetone can be applied to the mating surfaces and held together under force or by clamping.
This will cause the bond to be chemically glued together. Such bonds are pretty strong. The more the surface area of the mating parts, the more strong will be the bond.
The process is fairly simple but requires a calm hand. Apply a little bit of acetone onto the part you’d like to “glue”. This will slightly melt the plastic, and at that moment, attach the other part to the melted edge to weld them together.
| Pros | Cons |
|---|---|
| It forms a durable bond between parts. | This technique can be used on ABS exclusively. |
| It’s a simple process. | Welded parts aren’t as strong as whole parts. |
| It’s relatively cheap. | |
| The skill level required to perform this operation is minimal. |
Final Finishing of 3D Print
This is the final step in 3D printing post-processing. Let us study these techniques such as vapor smoothing, polishing, and dipping in detail. The extra effort that goes into performing finishing techniques certainly pays off in the end. This helps in creating the smoothest possible surfaces of your print. No one will ever suspect your parts came off a 3D printer!
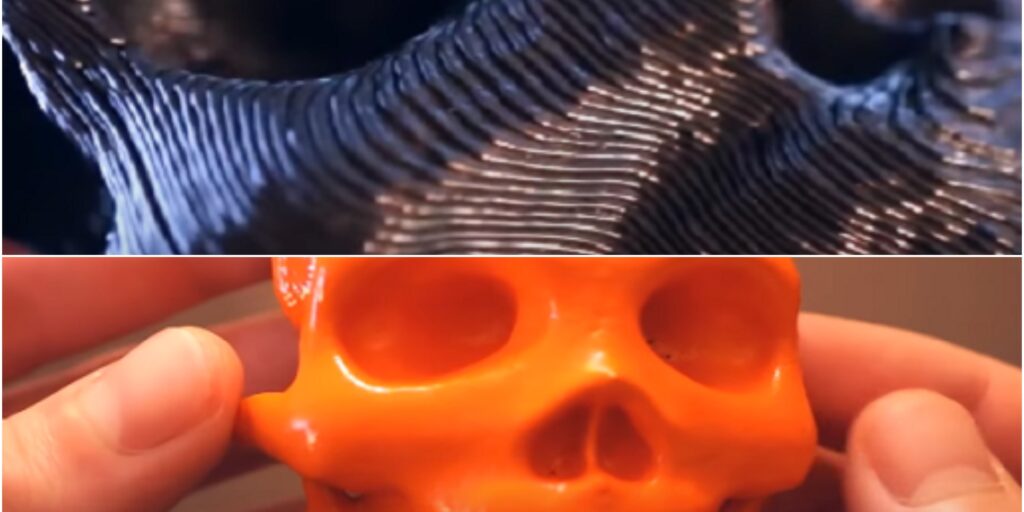
Vapour Smoothing
Acetone is used in this FDM post-processing technique. This technique is usually employed while operating with ABS filament. The 3D printed object is exposed to vapors of acetone in a closed environment. The vapors react with the outer layer of the object and it starts to melt. The process melts the layer lines and smoothening the outer layer of the object giving it a glossy look.
Again the drawback of employing this technique is the unequal removal of the material which affects the dimensional accuracy of the product. Since the process cannot be controlled the part has to be constantly observed and has to be removed from the enclosure once the desired finishing is achieved.
This method can be used for luxury goods where aesthetics are more important than dimensional accuracy. In case you have some 3D prints made from PVB filament, you can use isopropyl alcohol to perform the smoothing.
NOTE: Extreme care should be taken while carrying out this process as acetone is highly flammable and can explode. Moreover, the fumes are harmful and if they are breathed in, can cause irritation and other harmful effects. The process must be carried out with all precautions and in a well-ventilated area.
| Pros | Cons |
|---|---|
| Acetone smoothens the prints to look shiny and glossy. | Works on ABS material. |
| Acetone is cheaper so this post-processing technique won’t burn a hole in your pocket. | Proper precautions have to be taken before using this technique, as acetone is a toxic chemical. |
| The process is pretty quick and simple. | A well-ventilated area is a must. |
| It might affect the dimensional accuracy of the part being processed. |
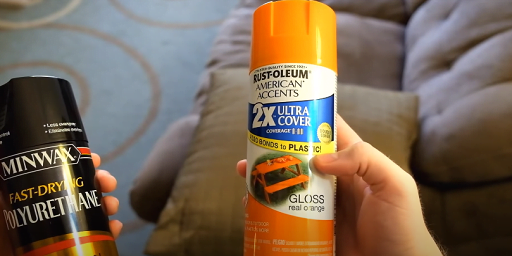
Priming and Painting
Priming is the process of coating the part with primer. It mostly acts as a base for a further painting job. Priming and painting are some of the most popularly employed post-processing techniques for FDM 3D printed parts.
Priming can be carried out only after the 3D printed part is sanded with moderate grit sandpaper (close to 600 grit). After sanding the part, spray the primer onto the part in two separate coats. Do take care of the safety precautions before spraying the primer and even while painting in the next step. After the first coat of primer, sand the part again and then follow it up with a second coat of primer. Spray the primer in quick light sprays.
After priming, let the model dry, and then painting can be carried out. Painting can be regular painting with a brush or by using sprays. While painting with a brush can help in making intricate designs, spray painting will be a quick approach to paint specific color regions. One tip is to mask the parts not to be painted by a specific color, as this will help in sharp color intersections.
| Pros | Cons |
|---|---|
| It really adds to the aesthetics, adding color. | It is relatively time-consuming unless you are a hobbyist. |
| It gives a smooth and consistent finish. | It is relatively expensive too because it makes use of equipment like paints, brushes, sandpaper, masks, and sprays. |
| It works on all available FDM materials. | |
| The parts of the model can be painted with multiple colors. |
Polishing
Polishing can be achieved by using a buffing wheel using a Dremel tool. A separate 3D printing Dremel toolkit is available for makers and creators to buy.
Polishing is done only after sanding. After sanding, rinse the parts and make them particle-free. Use a cloth and move it in a circular motion until you’re satisfied with the result. This will enhance the finish of the print.
Polishing 3D prints can be done with plastic polishers and tools available at almost every hardware store.
| Pros | Cons |
|---|---|
| It can be done using common electric tools. | It releases fine particles into the air, which can be inhaled by the operator and are a health hazard. |
| It’s an easy process. | It requires adherence to a set of safety precautions. |
| A moderate amount of skill is necessary to pull it off. |
Electroplating
Electroplating is a great option for the post-processing of FDM 3D printed parts. Electroplating is basically transferring a metal coating from one metal to another (or a part with a conductive surface). Electroplating is possible thanks to a chemical process called electrolysis. Two main tools for electrolysis are a power source (battery or rectifier) and an electrolyte.
The electrolyte is a mixture of metal salt (of the metal that you want to coat your part with), an acid, and water. An electric current is needed to initiate the reaction between the cathode (connected to the power source’s negative pole) and the anode (positive pole).
The anode is made from the metal you want to use as a coating, and the part to be plated acts as the cathode. Both the anode and the cathode are then dipped into the electrolyte.
Generally, plating services are available. ABS can be easily and readily electroplated and such care should be taken while choosing the material for the part.
Electroplating can not only enhance the look and feel but also increases the strength of the part. As 3D printed parts are plastic and non-conductive, one needs to sand them properly and apply conductive paint before attempting electroplating.
| Pros | Cons |
|---|---|
| It significantly improves the look, feels, and surface properties of a part. | Only a limited number of materials which include ABS can be electroplated. |
| It is also capable of increasing the strength of a part. | It’s pretty expensive. |
| You have plenty of options for outsourcing the process of electroplating. | It’s a complicated process. |
| It requires a professional level of skill. |
Hydrographics
One of the most exciting techniques for post-processing of FDM 3D printed parts is Hydrographics. It is also called Hydro Dipping, Immersion printing Water Transfer printing, water transfer imaging, etc., is a process of applying printed graphic designs to solid objects using special water transfer paper. This paper has one side made from PVA, onto which graphics are printed with an inkjet printer.
This post-processing technique is used on various materials like plastics, metals, wood, glass, etc. It is basically used for enhancing the aesthetics of the object and does not change the feel or any dimensional properties.
Hydrographics is commonly used in various industries and can be effectively used on 3D printed parts as well.
| Pros | Cons |
|---|---|
| It enhances the aesthetics of the product. | It makes use of expensive apparatus. |
| A multi-colored or patterned design can be added using this. | A certain level of dexterity is required to carry out the process. |
| It works with all the common printing materials such as plastic, metal, wood, or glass. | |
| It has no effect on the dimensional accuracy of the print. |
Despite its popularity, 3D printing is still a relatively new technology and there are gaps in the information available about health and safety risks. As discussed in the techniques, you should also know the hazards of post-processing techniques. It may vary depending on the type of materials used. Some common hazards include:
- Breathing in harmful materials: 3D printing can release particulates and other harmful chemicals into the air.
- Skin contact with harmful materials : Users can get hazardous materials, such as metal powders, solvents and other chemicals, on their skin.
- Static, fire and explosion : Some materials used can be flammable or combustible. High temperatures from some printers can cause burns.
We will not leave you at any risk, so we also provide some of the safety measures to reduce exposure to 3D printing hazards.
- Limiting equipment access to trained or authorized personnel.
- Using enclosures for 3D printers and ventilation to capture chemical emissions.
- Using materials with lower emissions.
- Reducing time spent near the printer while it is running.
- Training workers on potential hazards and how to protect themselves.
- Wearing appropriate personal protective equipment, such as safety glasses, gloves, or lab coats.
FAQ’S on FDM Post-Processing
Sanding is the most critical part of post-processing techniques. Generally, FDM 3D prints can have a slightly rough surface, and sanding is the easiest way to smooth it.
Smoothen any apparent blemishes with sanding. Clean the parts with rubbing alcohol, if applicable, glue parts together. Use a product like BONDO to fill gaps and seams, then sand smooth. Spray with an aerosol primer filler and then sand, repeat this step a couple of times to get the best result.
Isopropyl alcohol does nothing. The rest more or less do the same dye does – it eats the PLA, it does not liquefy it so it’s absolutely useless for smooth (good for stripping PLA-based support).
Cyanoacrylate Glue is usually the best choice when gluing PLA parts. Any brand will work: Gorilla Glue, Loctite, SuperGlue, extra-strong glue, or any instant glue.
Conclusion
The above-discussed post-processing techniques enhance your 3D print. The final product looks neat, smooth with shiny surfaces. You can also, use these techniques for your improved printed part’s aesthetics.
It is important to emphasize the point that post-processing isn’t all about enhancing the aesthetics of the object but, also its other properties such as texture and strength. It is important to wisely select the most suitable process for a specific application. By making the correct decision you can completely revitalize your creation.
Looking forward to your comments and queries in the box below.
THANK YOU!!