Stereolithography – most commonly referred to as SLA 3D printing- is one of the most rising, popular, and widespread techniques in the world of additive manufacturing. It works by using a high-powered laser to harden liquid resin that is contained in a reservoir to create the desired 3D shape. An SLA model will typically be created using computer-aided design(CAD) software before being exported as an STL or OBJ file to be prepared for 3D printing. One of the requirements for a good print is a well-designed model that is optimized for 3D printing.
Although most of the patterns and prints through SLA printers are perfect, some designs like overhangs give a headache to new printing enthusiasts. The main problem with overhangs is that they tend to sag without enough supports. While there is no extensive or ultimate guide for SLA designing, there are conventional techniques and proven methodologies that will help you with this problem.
What is the best way to print Overhangs in SLA 3D Printing? The best way to print overhang is by providing supports. Although, all the overhangs in SLA 3D printing don’t require supports the overhangs that are at 19 degrees from the horizontal or more than 1.0 mm length requires support absolutely. All these things are explained in the post in detail.
In The Post:-
- Problem Associated With Overhangs
- Generic Overhangs Problems
- Overhangs Problem Specific to SLA 3D Printing
- Tips For Printing Overhangs
- Our Observation & Experience
- FAQ on Overhangs
- Conclusion
Problem Associated With Overhangs
RESIN 3D printing is different from FDM printing in several ways. The major fact being that the former utilizes a process of carrying particles of liquid resin by exposing them to light typically, ultraviolet light.
When exposed to UV light the resin hardens and sticks to other nearby particles of hardened resin. Since the uncured resin is liquid, the process is done upside down, so the build plate can dip in and out of the vat. The build plate moves up as each layer is printed, which means that the printed part is hanging upside down stuck to and suspended from the build plate. Of course, it needs to stay connected to the build plate and not fall into the VAT especially, not in the middle of printing.
Let’s say we print a capital letter T. In FDM PRINTING, it would print the base of the T just fine, but when it gets to the crossbar, then the problem comes. The farther you get from the base, the more the melted filament wouldn’t be able to support its weight. The same problem exists in RESIN PRINTING, but here it is formed upside down.
Both the technologies have one thing in common that you can’t print something in midair.
In the former case, you can add support structures to hold these parts up to print something, like a scaffold, that the overhangs can connect to. Thereafter, these scaffolds(supports) can be snapped off and removed. While in the latter, as the supports are printed above the piece and the overhangs can be suspended from the support structure.
In SLA, overhangs become a concern when the model lacks enough support structures. In fact, without enough supporting structures, overhangs are impossible to print unless certain requirements are met.
Generic Overhangs Problems
In the case of printing large surfaces without supports, any overhang(large surface) needs to be at least 19 degrees from the horizontal. Printing at less than 19 degrees will cause the overhang to break off due to its own weight.
Large surfaces become heavy with their own weight and as we proceed in the process it becomes over the limit and gets separated from the base or near the base.
Solution of Printing Large Surfaces
To print large surfaces at an angle either print them at an angle greater than 19 degrees with horizontal. You can also print them with supports if the surface is having an angle lower than 19 degrees with the surface.
This angle is decided after many trials and experiments in our labs and thus it is more of an experience thing than any fixed practice. It is generally applicable for printing overhangs in both SLA and FDM technologies.
Overhangs Problem Specific to SLA 3D Printing
Layer Adhesion in Overhangs in SLA
When considering orientation, the main concern is the Z-axis cross-sectional area. The print is likely to stick to the tank if the 2D cross-sectional area is larger. This is because the forces responsible for the sticking are directly proportional to the 2D cross-sectional area of the print.
In SLA 3D printing there’s a VAT of resin at the bottom. A transparent sheet of FEP (Fluorinated Ethylene Propylene), which the resin shouldn’t chemically bond with is used. There is a metal build plate that moves up and down. The build plate is moved down leaving a 50-micron (depended upon your layer height settings) coating of resin between the FEP and build plate.
For the first few layers, it is overexposed to help resin to adhere the build plate. But, when the layer has been exposed the resin also sticks to the FEP. Then, the build plate is lifted up. THE RESIN SHOULD HAVE A GREATER ADHESION WITH THE BUILD PLATE THAN THE FEP.
It somewhat peels off the FEP, and sometimes a little snap is heard. Then, again it moves down and a 50micron gap is left and the process is repeated. After the first few layers, the exposure time is reduced, as printing continues, more and more weight is added to the part. (Image attached below for better understanding)
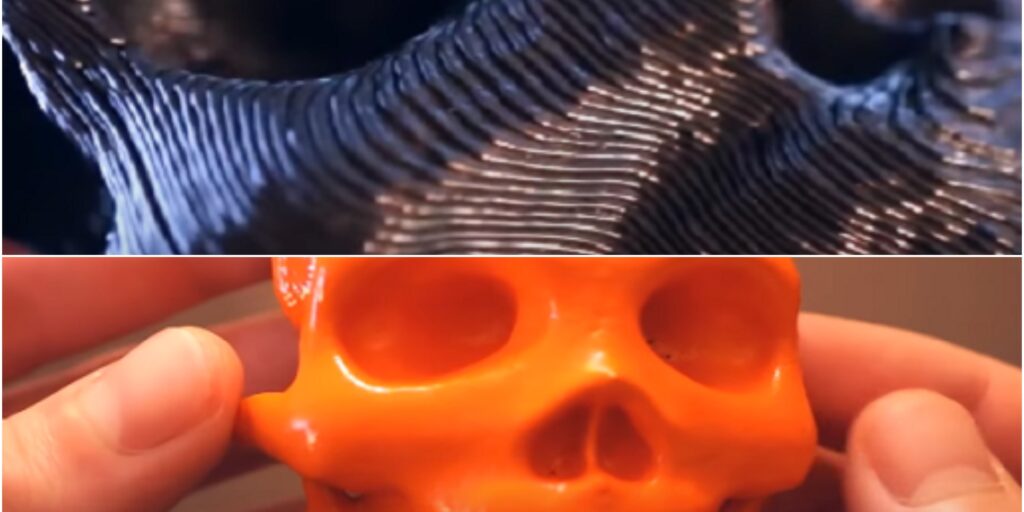
This process is repeated layer by layer, and sometimes in the case of overhangs, when is layer is not supported it gets either stuck on FEP or free from both bed and FEP and floats in the VAT of the SLA printer.
Solution
Minimize the Cross-Sectional area along the Z-Axis.
You will have to orient your print at an angle if you want to reduce the Z-axis cross-sectional area, but this will increase the support structures needed. Orienting your print also increases the smoothness of the flat surfaces in the SLA 3D printer.
Overhangs Longer Than 1.00 mm
It is recommended that a maximum unsupported overhangs length should be 1.0mm. Anything beyond this will be slightly deformed, and the deformation will increase as the length increases.
Up to 1 mm overhangs are strong enough to keep themselves together by their inter-molecular force of attraction but after that gravitational forces become more prevalent and this results in the sags and breakdown of resin.
Tips To Print Overhangs in SLA 3D Printing
Failure Factors:
- Pulling and Pushing forces
- Stretchability of the resin
- Fluid Dynamics
- Angle With Horizontal
All four of the above factors can be solved by keeping the angle and length of your overhang in mind. Always provide support if the overhang is at less than 19 degrees with horizontal or its length is greater than 1.00 mm on free space or both.
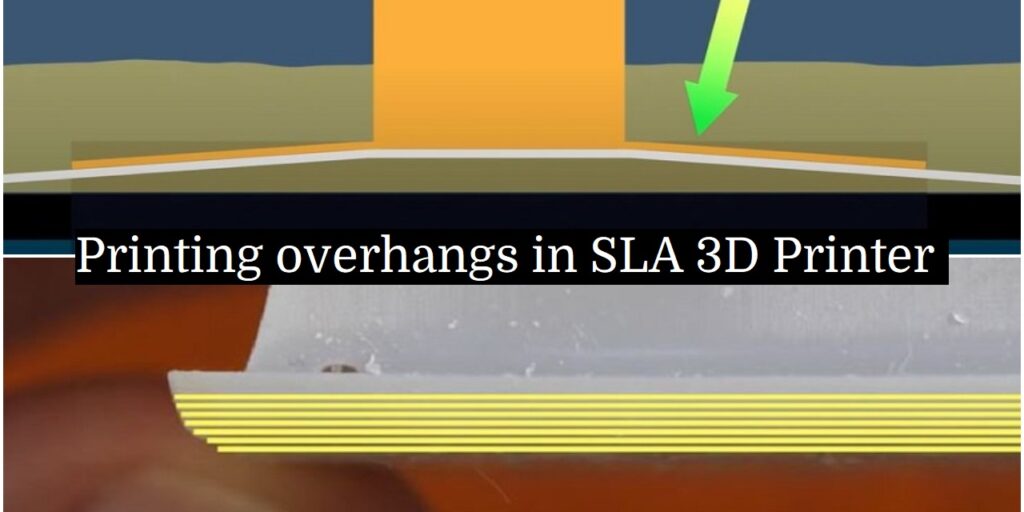
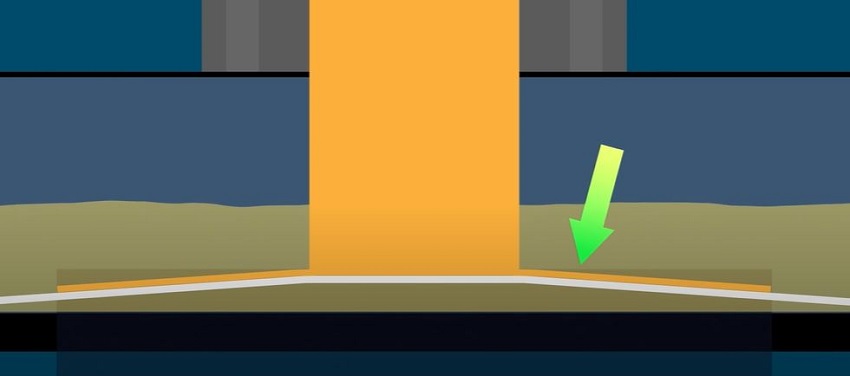
The overall problem is that at some distance away from the base an overhang probably droops down and folds over on itself or tears off and becomes a particulate floating in the resin. As we continue printing the T-bar (our example) the process is repeated for the next slice and this time a little more of the bar is retained, and a little fewer tears off. This makes the perfect square edges curved (image attached below).
In the image below we have printed the lower surface (lowermost yellow layer) length equal to the upper layer (Uppermost yellow layer) but due to its length it broke off and as it gained support layer length increased to its original length layer by layer, giving a curved edge as a result.

Our Observation & Experience
We also can’t add too many supports. In SLA printing the surfaces that face away from the build plate come out the best. It is assumed that the underlying structure holds smooth, but if the surface is parallel to the build plate and faces the build plate, there will be issues with the surface.
Also, if there are supports added to it, then it will make the surface skewered and our post-processing will increase.
- Printing Parallel to the build plate isn’t always bad. If there are two surfaces, face the important surface away from the build plate ,and the less important one towards the build plate.
- The parts are printed upside down. And the parts are suspended from the support not being held up.
- Surfaces facing the build plate are problematic.
- Rotating the print orientation 30-40 degrees Can fix a lot of problems. But, it may require additional supports and have to deal with cleaning those up.
- To decide what angle is best, look at what surfaces will be parallel after rotation.
FAQ on Overhangs
Although printing positions in FDM and SLA printers are opposite, when it comes to overhangs they both can’t print perfect overhangs without support.
The major criteria to look out for is the angle with the horizontal and length of the overhang. If it is making less than 19 degrees and have a length greater than 1.0 mm, supports will be needed in any of the case or both.
Conclusion
There you have it!! Now, you can build your own prints by avoiding these overhangs, along with some ideas if you want to avoid them instead.
We are waiting for your feedback in the comment section. For more like this, don’t forget to check our site themechninja.com.
HAPPY PRINTING!!
Good post. I learn something totally new and challenging on websites I stumbleupon on a daily basis.
It will always be interesting to read content from other writers and practice a little something from other web sites.