While making a DIY drone we need different types of drone motors for different purposes. Each of these purposes requires its own specific thrust values, and if we install some motor without knowing its thrust then our drone project as a whole may result in a fail. Thus, it becomes very important to know the exact thrust of the motor to be used besides the manufacturer’s claims on the box.
We at TheMechNinja.com have faced this problem many times and thus thought of a simple thrust test rig that can be easily made with the help of a 3d printer at home (If you don’t have one check DIY 3D Printer). It’s very easy to print and install, it also works perfectly and has been tested by us many times. So, without further ado let’s proceed with the thrust test rig procedure.
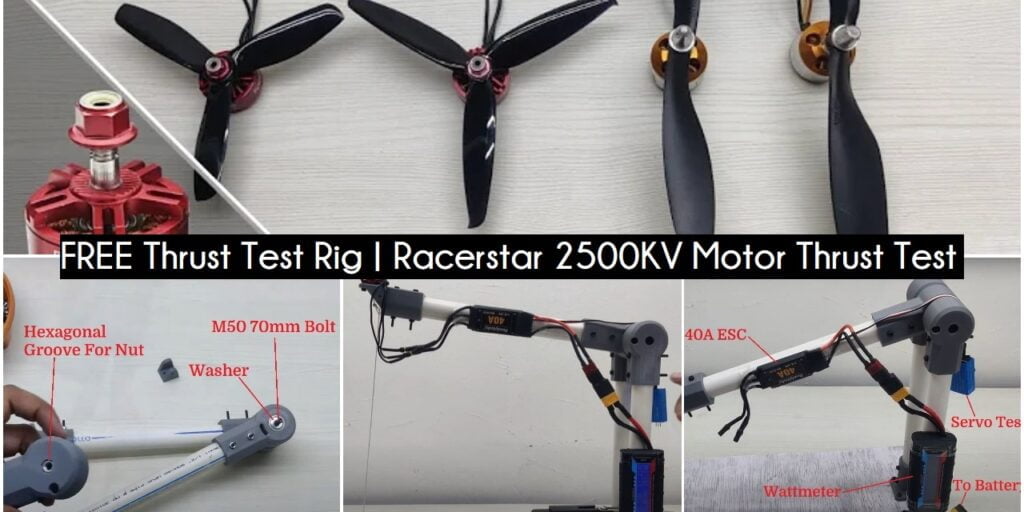
What is the real thrust of the Racerstar BB2207S 2500KV motor? After testing it with our thrust test rig with 5-inch & 6-Inch Tri-Blade (Manufacturer recommended) propellers we get 690gms & 900gms respectively in place of manufacturers 810gms thrust claim for the 5-inch blade, let’s see how we reached the conclusion and why this happened.
In The Post:-
- Motor Thrust Test Procedure
- Building Trust Test Rig
- Electrical Component & Motor Assembly
- Thrust Tests With Different Propellers
- Comparison Table For Different Motors Thrust Test
Motor Thrust Test Procedure
In this article, we have used the Racerstar BR2207S 2500KV (Amazon USA) motor for the thrust test rig. Racerstar BB2207S 2500KV is available on Bangood at approx 2800 Rs. for readers in India. We will be doing a thrust test on the motor with the help of a 5-inch 3-blade propeller (recommended by the manufacturer) & also with a 6-inch 3-blade propeller.
We will use our thrust test rig to test our Racerstar BR2207S with both types of blades. Now, as we are doing it we will also test our old 1000KV motor for both types of propellers. After performing all 4 tests we will have a discussion about the actual thrusts and the thrust claimed by manufacturers. We will also talk about their efficiencies in each case.
Building Trust Test Rig
The first thing you will need is our customized 3d printable thrust test rig parts which are free to download.
Motor Thrust Test Rig
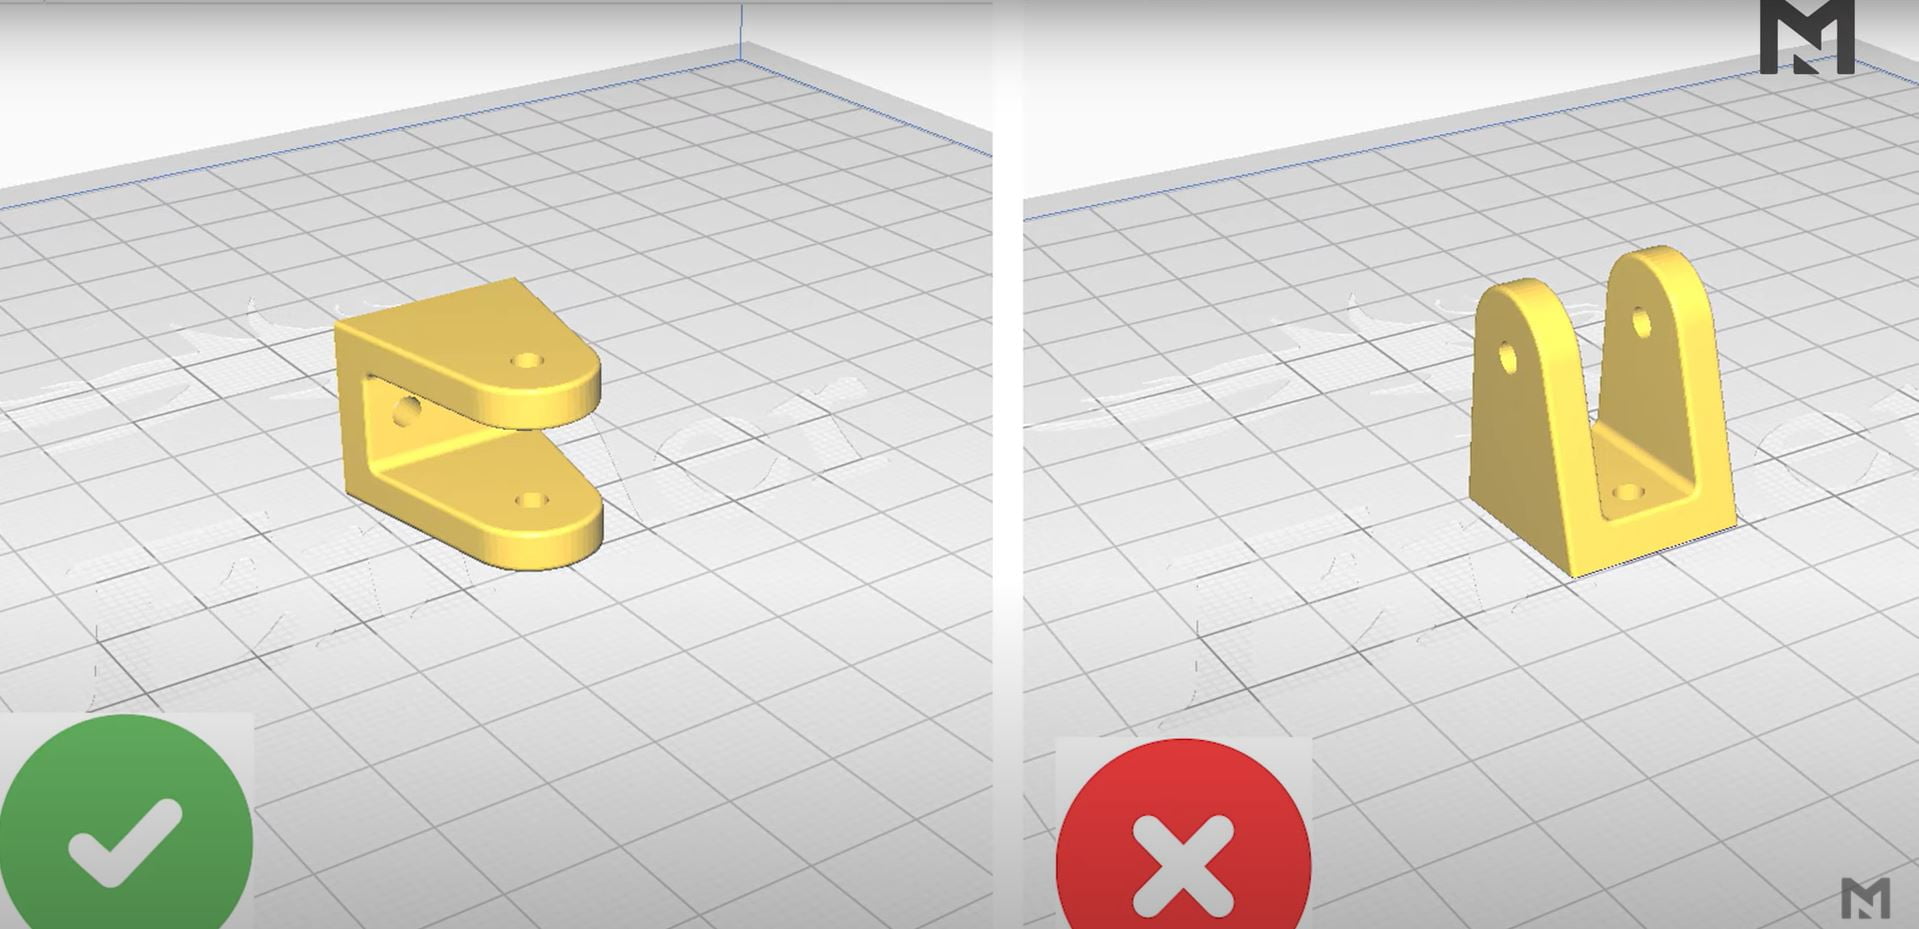
Now, download and print the parts with 0.2mm layer height and 30% infill for better strength. Keep in mind to print the pulley holder in the alignment as shown in the picture below. If you do it otherways then there is a good chance of layer separation due to force. You will need to print the Thrust tester stand 3 times and all other parts in the file are to be printed single.
Let’s start with building our thrust test rig. There is a total of 9 parts required to build it, as listed below. We will explain their use as we proceed with the article.
| S.No. | Part Name | Quantity | Where To Get |
|---|---|---|---|
| 1. | Racerstar 2500KV Motor | 1 | Racerstar BR2207S 2500KV (Amazon USA) Racerstar BR2207S 2500KV (Banggood) |
| 2. | Pulley | 2 | Pulley (Amazon USA) Pulley (Amazon India) |
| 3. | M3, M5 Allen nuts and bolts | As Required | M3 Allen nuts and bolts (Amazon USA) M3 Allen nuts and bolts (Amazon India) |
| 4. | Wattmeter | 1 | Wattmeter (Amazon USA) Wattmeter (Amazon India) |
| 5. | 40 Amp Esc | 1 | 40 Amp Esc (Amazon USA) |
| 6. | Spring balance | 1 | Spring balance (Amazon USA) Spring balance (Amazon India) |
| 7. | Servo Tester | 1 | Servo Tester (Amazon USA) Servo Tester (Amazon India) |
| 8. | 11.1 Volt battery | 1 | 11.1 Volt battery (Amazon USA) 11.1 Volt battery (Amazon India) |
| 9. | 1/2 Inch PVC pipe | 3 | Two Pipes (24 cm Long) One Pipe (25 cm Long) |
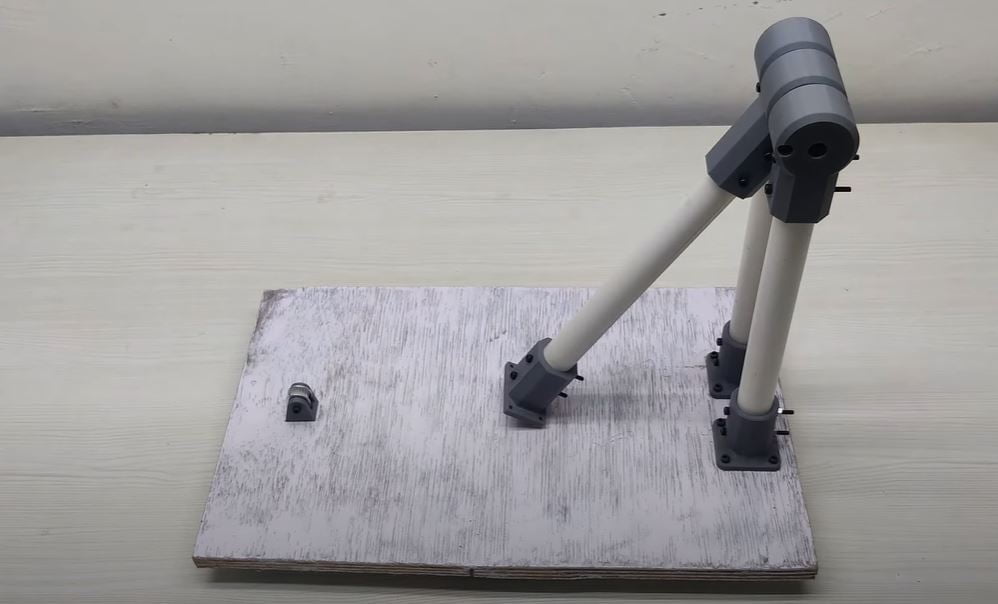
After you have procured all of the parts listed above it’s time to head for assembly. First, we will assemble the 3D printed parts and pipes together to create a frame for the thrust test rig. First, see the image given below, we have to make it by using 3D printed parts, 1/2 inch pipes, and M5 & M3 nuts, now follow the following steps.
Drill holes in the pipes with the help of printed parts by inserting the pipes in them and drilling from above.
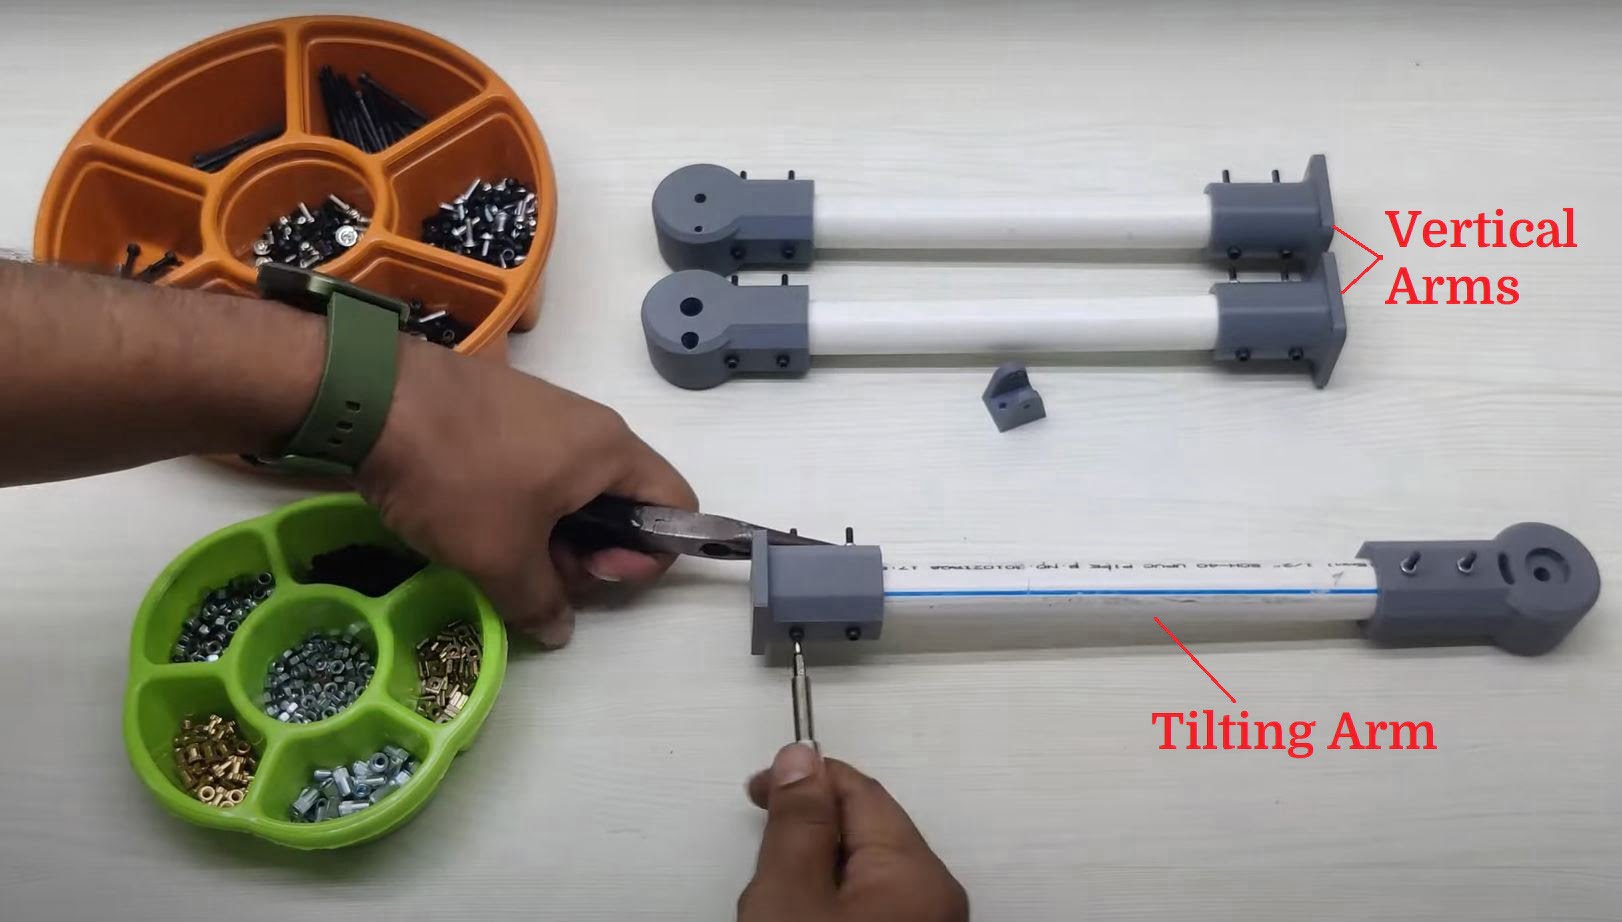
- Make two vertical arms by using 24 cm pipe and tightening Thrust Tester Stand on one side & Vertical Stand on another side by using 40mm M3 Screws. (See image below)
- On 25 cm pipe tighten Thrust Tester Stand and Center Rod Holder similarly as above, this will become tilting arm. (See image below)
- Now, attach 2 625zz bearing on both sides of center rod holder in tilting arm for smooth motion.
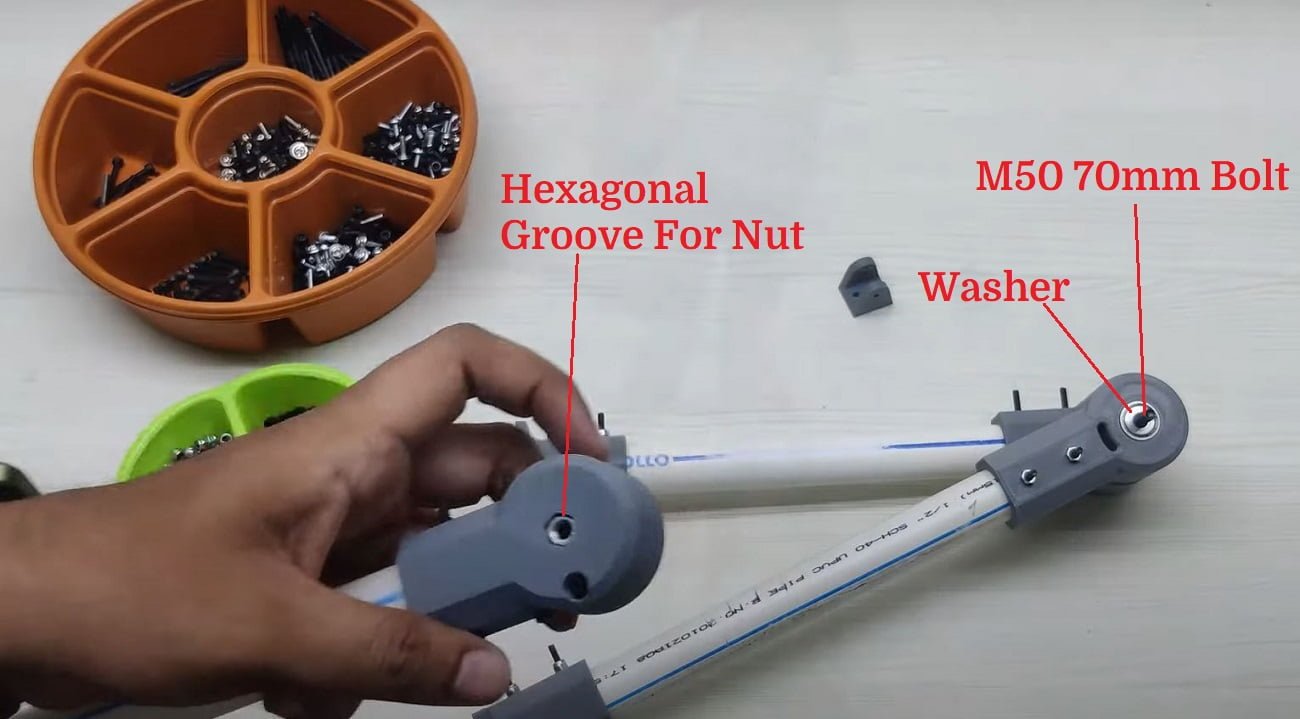
- It’s time to assemble all three arms together. Use 70mm M5 bolt along with two washersand a nut to connect the arms.
- First pass the bolt through one vertical arm then pass a washer through the other side (to eliminate unnecessary friction losses), pass the tilting arm arm then washer and then the other vertical arm(this arm will have a hexagonal groove for nut). Now tighten them together and check for smooth movement.
- Attach the pulley on Pulley Holder with a M3 screw of 20mm length.
- Now, we will use a base for placing all the things together. We have used a ply board for the same you can use anything that is available at your disposal.
- Now, screw all the things on the board as shown in the first image.
- There is no need to worry about pulley holders placement just keep it aligned with tilting arm.
Electrical Component & Motor Assembly on Thrust Test Rig
Now, our frame is complete. Next thing is to attach our motor (i.e. Racerstar 2500KV motor). Follow these simple steps to do so.
- Remove the thrust tester stand from the tilting arm and attach the 3d printed motor mount and tighten it.
- Now place your motor (Bullet connectors pre-attached) and align the bolt holes and tighten it using M3 screws.
That’s it now it’s time to attach the electrical parts of the rig. Follow the steps given below.
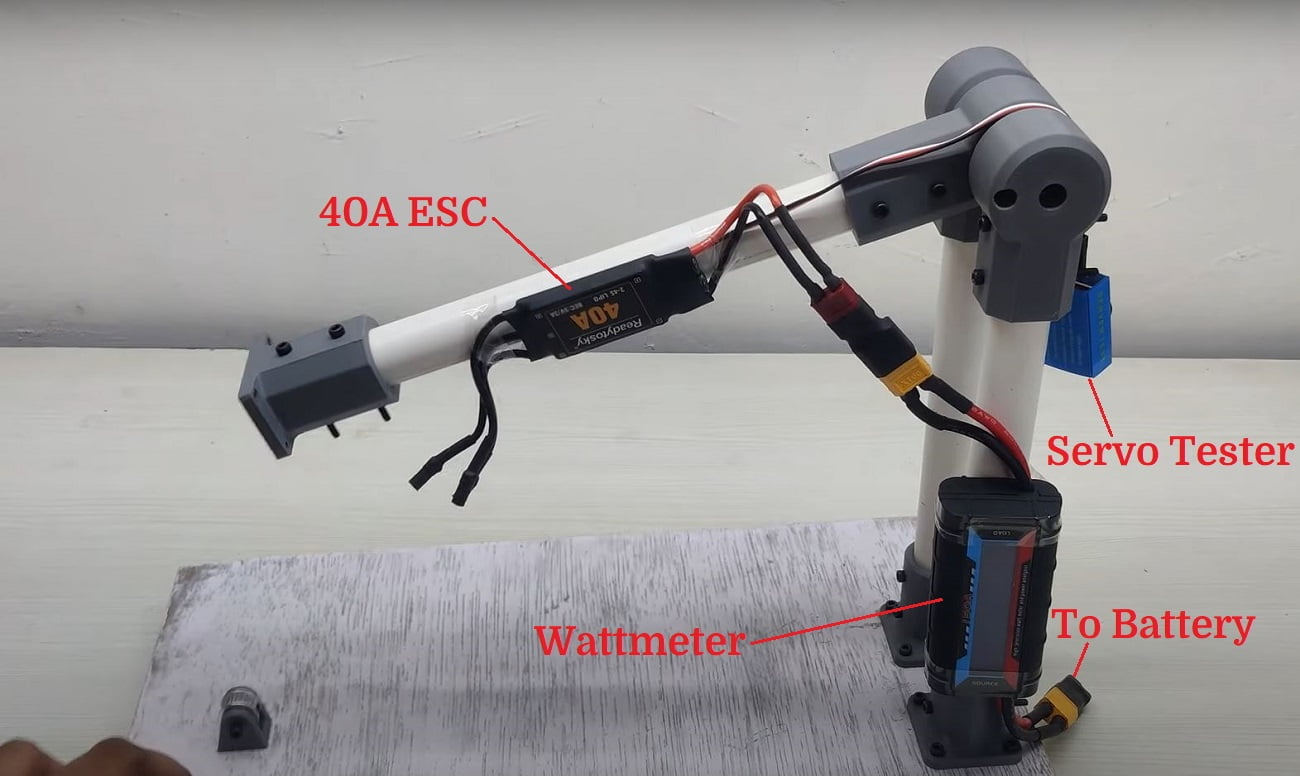
- We are using a 40A ESC which is connected to the Wattmeter and then to the Li-Po battery.
- After optimizing placements for every part we ended with placing ESC on the tilting arm, which is not right. We know it will increase the unnecessary weight on the arm, but it’s unavoidable (If you suggest any othr way then please comment below).
- Also, attach the servo tester. Everything should look as shown in the figure below.
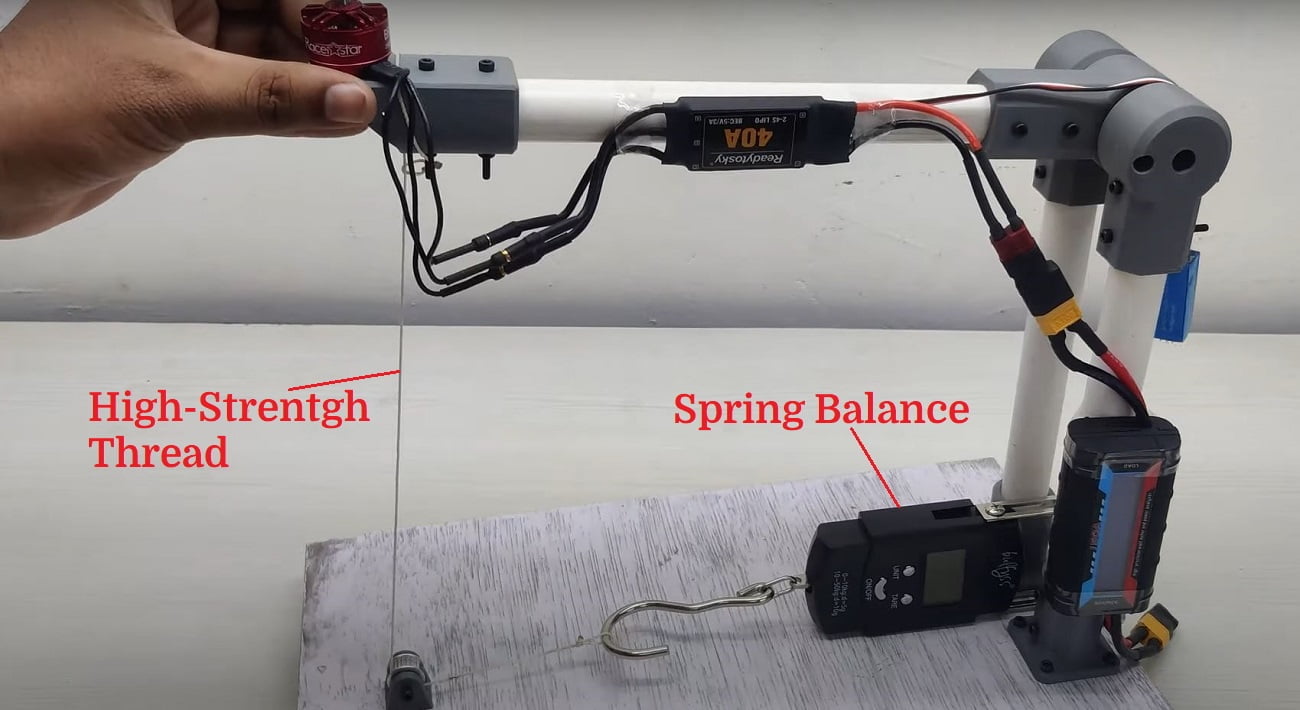
Now, to transfer the thrust from the motor to the spring balance we will use a high-strength rope. Simply tighten the rope through a loop with the motor and another end will go with the spring balance.
We are using a spring balance of 50KG upper limit. Place it between the vertical arms and hold it in place by passing a solid bar (in our case we are using a wrench) through it. Now, tighten the other end of the rope to the spring balance. (See image below)
Thrust Tests With Different Propellers
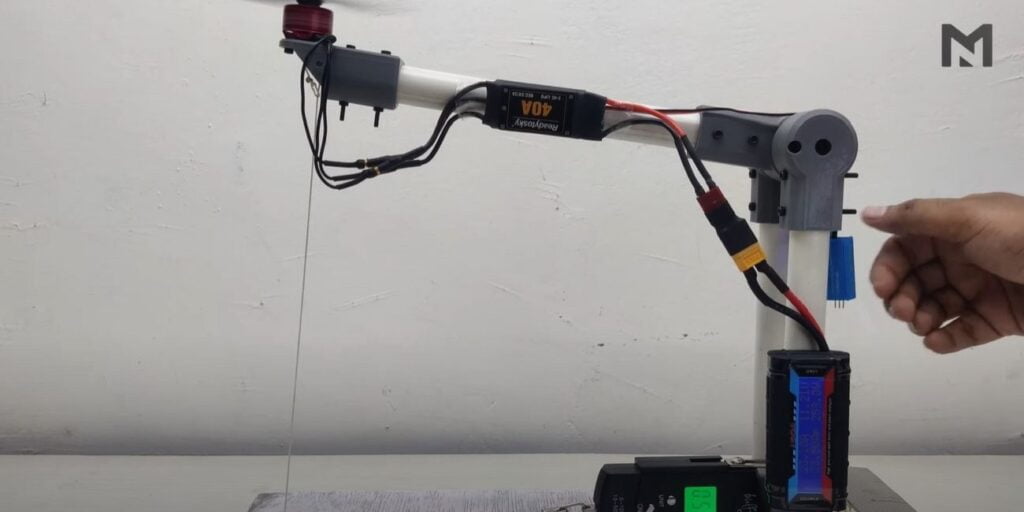
Attach the Li-Po battery in the Wattmeter, and as soon as you plugin you will hear a beep sound from the motor which means everything is ready. Also, switch on the spring balance.
Everything is complete and attached in place, now it’s time to attach the propeller you want to do a thrust test with. We will perform with 5-Inch & 6-Inch Tri-Blade propellers and our old motor (1000KV) with 10-inch & 8-Inch Dual-Blade propeller.
Note:- Please use safety glasses while working with motors.
1.) 5-Inch Tri-Blade Propeller
Attach the 5-inch blade on the motor and tighten it. Now start your test.
We see that the maximum thrust recorded is 595gm and adding 95gm of the arms we can say the total thrust generated is 690gm at 23.12A current.
We will discuss the efficiency and other things of both motor and all propellers in the next heading.
2.) 6-Inch Tri-Blade Propeller
After performing the test with a 5-inch propeller remove the battery and then the 5-inch propeller. Now, attach the 6-inch propeller tightly and plug the battery, you will hear a beep sound again.
Now, perform the thrust test and note down the readings. We recorded 805gms on the spring balance, adding 95gm(arm weight) to it we get a total thrust of 900gms at 34.30A.
3.) Thrust Test With 1000KV Motor & Dual-Blade Propellers
Now, again remove the battery and the motor from the motor mount. We have an old 1000KV motor so we wanted to test its thrust also and have a good comparison between all.
We will perform its thrust test with 10-inch & 8-inch dual-blade propellers. The process is similar to the ones we have done above.
But, this time we need to hold down the test rig platform as the thrust area has increased because the diameter of the blade has increased. This produces thrust in areas away from the board and thus causes its movement.
Here we are using a simple brick that weighs around 3 KGs so you could use something similar to hold down the platform.
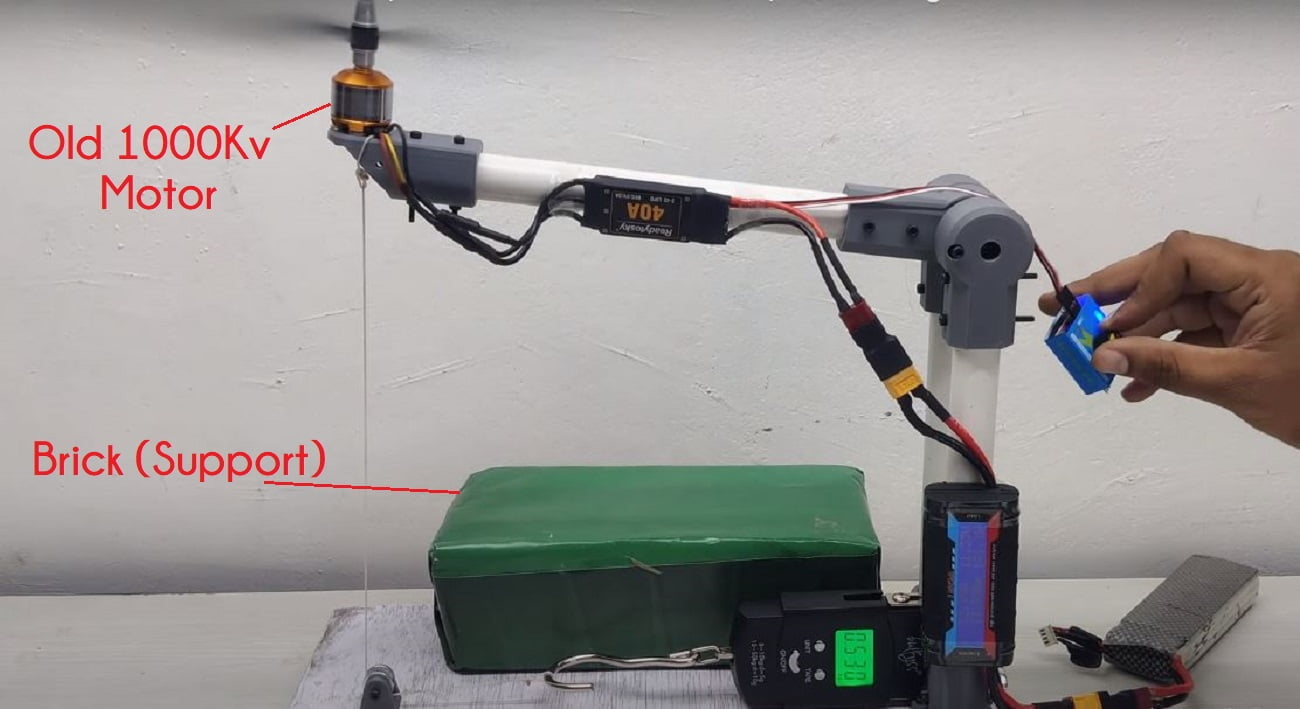
With 10-Inch Propeller we recorded 530gms adding 95gms (arm weight) we get 625gms as the thrust at 12.75 Ampere.
With 8-Inch Propeller we recorded 415gms adding 95gms (arm weight) we get 510gms as the thrust at 9.60 Ampere.
We will have a comparison of all four in the next heading.
Comparison Between Different Combination For Thrust Test
Deductions we can make base on our thrust test.
| Motor | Propeller | Recorded Thrust (gms) | Current (A) | Arm Weight (gms) | Total Thrust, G (gms) | Power, W (Watt) | Efficiency =G/W |
|---|---|---|---|---|---|---|---|
| Racerstar BR2207S 2500KV Motor | 5-Inch 5045 Tri-Blade | 595 | 23.12 | 95 | 690 | 261 | 2.64 |
| Racerstar BR2207S 2500KV Motor | 6-Inch 6042 Tri-Blade | 805 | 34.30 | 95 | 900 | 352 | 2.55 |
| A2212 1000KV Brushless Motor | 10-Inch 1045 Dual-Blade | 530 | 12.75 | 95 | 625 | 144 | 4.34 |
| A2212 1000KV Brushless Motor | 8-Inch 8045 Dual-Blade | 415 | 9.60 | 95 | 510 | 111 | 4.59 |
Manufacturer claimed statistics

Talking about the Racerstar motor the 5-inch propeller produces 690 grams of thrust at 23.12 Ampere. While the 6-inch propeller produces 900 grams of thrust at 34.30 Ampere.
Though the 6-inch produces more thrust as compared to the 5-inch one it’s less efficient as compared to the 5-inch propeller. Maybe this must be the reason why the manufacturer doesn’t recommend a 6-inch propeller.
Let’s talk about the 1000 KV motor. The 10-inch propeller produces 625 grams of thrust at 12.75 Ampere while the 8-inch propeller produces 510 grams of thrust at 9.60 Ampere. Though the 8-inch produces less thrust as compared to the 10-inch one, it is efficient as compared to the 10 inch one.
In fact, the 1000KV motor is much more efficient than the Racerstar motor they are almost twice as efficient as the Racerstar motors.
But each motor has its own applications. Racerstar motors are designed for racing drones and thus give a quick thrust in a very short period of time. That’s why they consume so much current and hence drain the battery quickly. But if you want to make an economical drone, or we can say a drone which has a long-lasting time of flight, Then you can go for a higher efficient motor or a motor that consumes fewer amperes. So here the thrust test is over.
From the above tables, you can see there is a slight difference between my performance chart and the manufacturer’s one. It’s because the ideal conditions at both places are different. My old battery could be one of the reasons.
If you have any doubts then please ask in the comment box below. Share with your friends and have a nice day. Thank You.