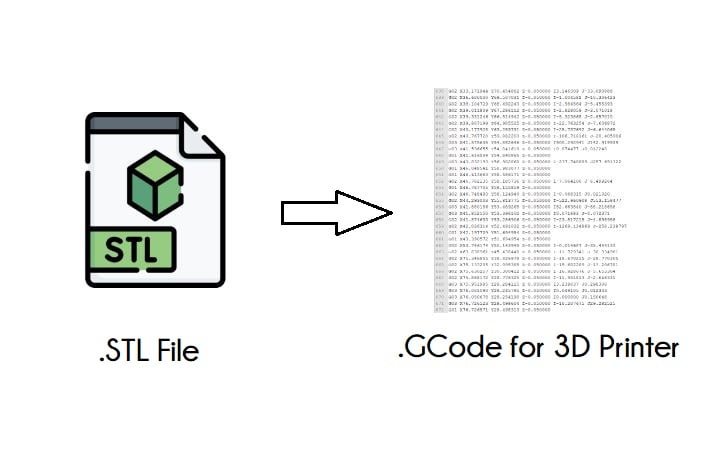
In this blog post, we are going to learn about .STL files and .Gcode files. We will discuss what they are, how they work, how to make one, and most importantly how to convert STL to GCode.
So without further ado let’s jump right into our post.
Convert STL to GCode
What is STL?
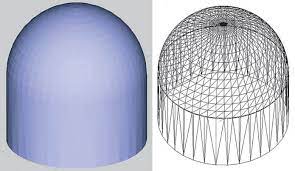
STL file format is made to describe only the surface geometry of 3d model and some other information of 3d model.
In 1983 Chuck Hull make a company 3D Systems which give service for consumer 3D printing the first-ever 3D printing is Stereolithography.
3D Systems Launch(.stl) protocol for converting CAD files into geometry which later convert to Gcode to run Computer Numeric Control Machine. STL protocol mainly launches for 3D printing.
STL has many different acronyms as- (Standard Triangle Language and Standard Tessellation Language).
Convert STL to GCode
Why we need to convert stl to gcode
Converting .stl to .gcode is also known as the slicing of 3d Model. In (.stl) file format it only defines the surface geometry of 3d model so our 3d printer firmware cannot process that directly for printing. Thus we use slicer software to convert .stl to .gcode.
(.gcode) is a file format that describes the shape in x,y,z, and some others information like(Extruder speed, Temperature). Which is help the controller to know which motor has to be run and in which direction.
Convert STL to GCode
Importance of Slicing in 3d printing
STL file only describes the outer surface of a model. In the STL whole model is hollow except the surface of the model so the current model is not robust and easy to break.
So in the slicer, we add some infill which gives our model robustness. Also, some parts of our model need support material to be print.
Support Material helps the printer to print those areas of the model which have an angle of more than 45 degrees. If we try to print at more than 45 degrees it is like we trying to print in mid-air.
If we try to direct print our 3d model from cad design or from STL file it works. 3d printers or other types of additive manufacturing machines are simply CNC. CNC needs x,y,z position in order to move the motor in the correct directions.
So we use slicer software to convert our STL model in a stack of multiple layers also it describes the linear movement of the extruder of 3d printer in the x,y,z positions.
This file also contains some additional commands according to the use of slicer software like- (print speed, extruder temperature, and heatbed temperature).
Convert STL to GCode
Step to Convert stl to gcode
Step 1. Slicer Software
You need to install slicer software on your PC. While installing or after installing it ask for file types that are support on the slicer. Chose Arduino support, Stl, and gcode support but you are free to select as your need.
There are many different slicer software in the market. You can find many free slicer software with great features.
- Ultimaker Cura
- SuperSlicer
- PrusaSlicer
- PrusaSlicer
- Slic3r
- Eiger
- Simplify 3D
- FlashPrint
Step 2. Printer Profile
First, you need to create your printer profile in slicer software. Many different consumer’s printers companies already gave their printer profile in the slicer but if you use custom build so you need to do this.
- Select the custom option from the printer.
- Add Printer maximum travel distance for all axes.
- Select Bed Type.
- Chose G-code type.
- Add Print-head dimensions.
- Add height difference between nozzle and z-axis in gantry height.
- Also, add extruder offset if needed.
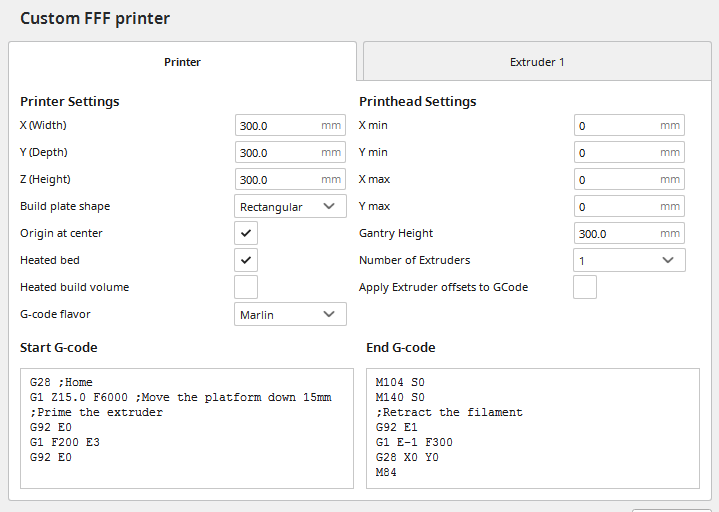
Start g-code and End G-code
Start g-code run before every print while End g-code run after every print.
If you know the g-code language then you can add them as your need but if you don’t know about g-code then leave them as they or you internet for the best g-code commands to start or end the print.
Step 3. Import STL File
After configuring the printer profile, import your STL file from the import option in the slicer. you see your model in the slicer.
Before you click on the slice button you have to do some more configuration according to your print
- Select Material Type.
- Select print speed.
- Chose Gradiant infill (It save your time and filament).
- Add Support.
- Select Adhesion type according to your filament type
Step 4. Slicing
After setting everything click on slice, when processing is complete you can see your model now convert into a stack of multiple layers. You can also see layer numbers and approx print time.
Now click on save on a disk or save it asks for the location where have to save click on save.
In your pointed saving location you can see a file with code extension, yes you have successfully converted stl to gcode.
Steps to check if file is successfully converted or not.
- Put that file in your printer SD card.
- Insert the SD card in the printer (In Marlin Firmware).
- Power on the printer.
- In LCD navigate to SD card here you can see your files.
Note: Before converting stl to gcode
Before doing anything with setting and parameters read your filament supplier manual or e-manual carefully. It already defines the necessary setting and parameters according to supplied material type.
Trending Posts
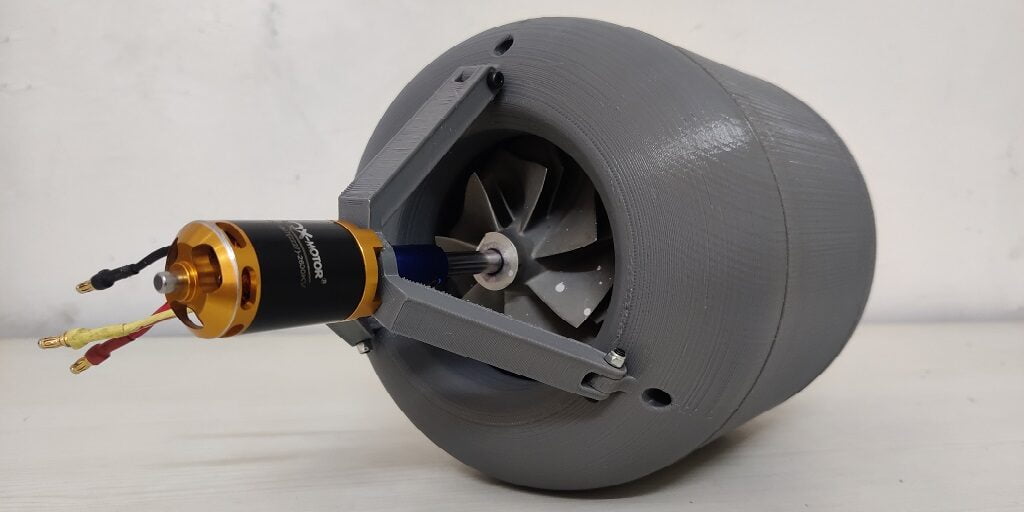
- DIY 80mm EDF And Thrust Test – All Steps

- DMLS 3D Printing Advantages & Disadvantages | Detailed
- 3D Printer Nozzle Issues | Solution & Details
- The Best & Cheapest IDEX 3D Printer | 2022
- 3D Printer Nozzle – Changing And Assembling Them
- Flexible Filaments Print Ideas | Settings & Ideas


Convert STL to GCode
Some Advance parameters in slicing
Here are some important parameters which are control while slicing.
- Wall Thickness
- Layer Height
- Layer Width
- Nozzle and Bed Temperature
- Retraction
- Line Width
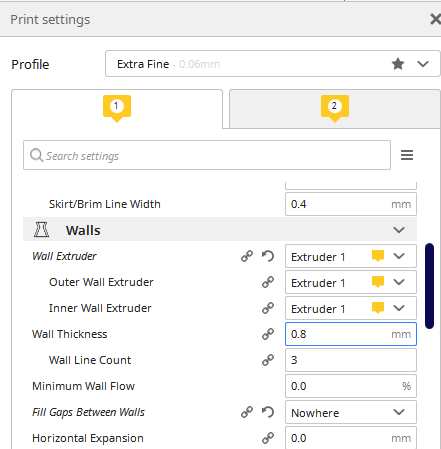
Wall Thickness
Assigning correct wall thickness is helps you to reduce the material uses and print time. Wall thickness may differ for each different material.
You can also control the quality of your print by selecting print order of wall, In print order, you can select which wall has to be print first internal or outer.
Layer Height
It describes how much height each layer has. In high detail print, you need to decrease the layer height so you can achieve a smooth surface finish but it increase the print time.
On the other hand in low detail print, you need to increase layer height so your surface finish may decrease but minimize the print time.
Nozzle and Bed Temperature
In case you need high-speed extrusion of material so you need to increase the nozzle temperature thus material gets melted in less time.
Also after unpacking filaments if you store them without any protection from the air, they absorb moisture, in that case, their melting point may increase due to the presence of moisture.
Also, you need to change the heatbed temperature according to your material so the material will stick well with the heatbed and decrease the chance of wrapping.
There are many other methods also to decrease the chance of wrapping.
Retraction
In a custom build printer, you have two options for extruder type (1)Direct Drive Extrude (2)Bowden Extruder.
In a direct drive extruder, you need to set retraction distance less than 1mm and in a Bowden type extruder, you need to set retraction distance less than 4mm.
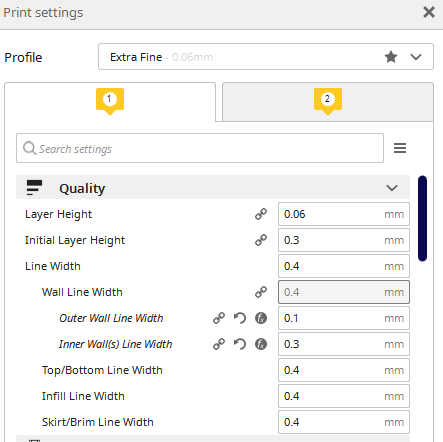
Line Width
In layer width, you can control the width of a single printed line. In 3d model, there are many different types of lines.
If set correct line width for each type of line it may result in good quality print and less print time. Here are some line type:-

- Top and Botton line width
- Infill line width
- Skirt and Brim line width
- Support line width
- Initial line width etc.
Something to keep in mind
There are many other advanced parameters to play with it. If you want to be more productive in 3d printing learn about them. Learn them also because your final print(Quality, Structural Strength, Print Time, and Cost of Print) heavily depend on them.
FAQ
There is mainly 5 types of line widths in 3d printing i.e. top & bottom, infill, skirt & brim, support line, and initial line width.
There are six types of parameters to control while slicing some important of them are wall thickness, layer height, and layer width.
Conclusion
We hope that our blog post on “Convert STL to GCode | Simple Yet Effective Process” has helped you solve your problems. If you have any doubts or questions then please ask in the comment box given below.
Thank You.